After experimenting with many different pizza dough recipes for thin crust pizza, I came up with the following pizza dough recipe. It is very easy to make and will produce a beautiful flaky crust that is crisp on the bottom. Either use your bread machine on the dough cycle or your stand mixer for preparing this dough.
Instructional Video: How to Make Pizza, Using Your Bread Machine
”
Bread Making Hints: Secrets to using the bread machine, About yeast in bread making, Sourdough Starter, and Quick Breads.
More great Pizza and Pizza Dough Recipes and Bread Recipes for your bread making.
- 3/4 to 1 cup warm water (110 degrees F.)
- 1 tablespoon olive oil, extra-virgin
- 1 teaspoon coarse salt
- 1 1/2 teaspoons granulated sugar
- 3 cups bread flour
- 2 teaspoons instant active dry yeast
-
Add all the dough ingredients (in the order listed) in the bread pan of bread machine. Process according to manufacturer's instructions for a dough setting. NOTE: Don't be afraid to open the lid and check the dough. It should form a nice elastic ball.
-
When dough cycle has finished, remove dough from pan and place into a lightly-oiled bowl. Cover the bowl tightly with plastic wrap and let the dough do a slow rise for 24 hours in the refrigerator before using. Do not skip this step.
-
NOTE: Check the dough (don't be afraid to open the lid). It should form a nice elastic ball. If you think the dough is too moist, add additional flour (a tablespoon at a time). The same is true if the dough is looking dry and gnarly. Add warm water (a tablespoon at a time). If you can not judge your dough by looking, stick your finger in and feel the dough. It should be slightly tacky to the touch.
-
Stand Up Mixer Instructions:
-
In a large bowl or in the bowl of a 5-quart stand mixer, add all the dough ingredients. Using dough hook, mix everything together into a uniform dough. The dough should form a nice elastic ball.
-
When dough has finished, remove dough from pan and place into a lightly-oiled bowl. Cover the bowl tightly with plastic wrap and let the dough do a slow rise for 24 hours in the refrigerator before using. Do not skip this step.
-
NOTE: Dough may be refrigerated at this point and stored until ready to use. To store each batch of dough, spray a plastic bag with nonstick spray and place the dough in it. Store no longer than 7 to 10 days, or if frozen for up to 2 months. If refrigerated or frozen prior to use, allow the portions to come to room temperature before they are rolled out.
-
Preheat the Pizza Stone or tiles to 450 degrees for 30 minutes. Prepare your favorite toppings; set aside until ready to use.
-
After dough has returned to room temperature, place the dough onto lightly-floured surface. Knead the dough several times and form the dough into an oval; cover with a towel and let rest for 10 minutes.
-
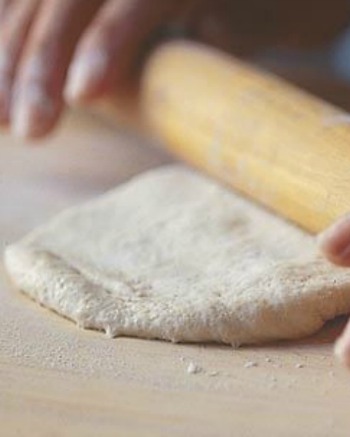
After the 10 minute rest period, on a lightly-floured surface, pressing down with floured fingertips, shape the dough into a small, flat disk. Working from the center, push the dough outward while spreading your fingers, making the disk larger.
-
Pick up the dough. Move your hands along the edges, allowing gravity to pull the dough into a 14-inch circle, oval, or rectangle.
-
Place the dough on the prepared Pizza Peel. The dough must be docked. NOTE: Thin pizza crusts usually need to be well docked to help control blistering and bubble formation during baking. This just means to prick it all over the middle part (not the edges) so that it doesn't inflate. Either use a Dough Docker or use a fork to prick the dough thoroughly.
-
Pre-cook the pizza crust for approximately 4 minutes before adding any toppings. After pre-cooking, remove the partially baked crust from the oven and pop any large air pockets with a fork. Let crust cool before topping (this will produce a crispy and chewy crust).
-
Brush the preheated dough with some olive oil and layer your pizza ingredients (toppings).
-
Bake for approximately 10 to 15 minutes or until golden brown on the bottom and the top is bubbly.
-
Remove your pizza from the oven and allow to cool for 5 minutes before transferring to a serving pan. This cooling down step allows the crust to stay crisp while it cools.
-
Once cool, using your Pizza Cutter or Pizza Wheel, cut your pizza into slices and serve.
-
Makes 2 (14-inch) pizzas - 1 (24-inch) pizza - 4 (6-inch) individual pizzas
-
Once the pizza dough is prepared, form the dough into a ball the size you would use to make one (1) large pizza. If making a larger batch of dough, for the dough into balls. Optional: Lightly spray each dough ball with cooking spray or lightly wipe with olive oil (making sure all sides are lightly covered). Place each ball of dough into individual re-sealable freezer bags. Seal, squeezing out all the air from the bag. Place in the freezer until ready to use. The pizza dough may be stored in the freezer for up to 3 months.
-
When ready to use, remove from the freezer and place in your refrigerator 12 hours or overnight. Before baking, remove the dough from the refrigerator and bring to room temperature, let sit on the counter for approximately 30 minutes. You are now ready to stretch out your dough and prepare your pizza.

2 Responses to “Perfect Thin Crust Pizza Dough Recipe”
Barbara Richards
It appears that the Perfect Thin Crust Pizza Recipe was based on another recipe but the instructions weren’t updated completely. This recipe says to ” let the dough do a slow rise for 24 hours in the refrigerator before using. Do not skip this step.” But later under Shaping Pizza Dough, it says “when the pizza dough is done, remove the dough from the bread machine to a lightly-floured surface”. It is not clear is the refrigerated dough should be brought to room temperature or allowed to sit before shaping it.
I happened to notice this discrepancy because I was looking for a thin crust pizza dough recipe using wheat flour and I was looking to combine the https://whatscookingamerica.net/Bread/PizzaWholeWheat.htm recipe with this one but wasn’t sure what to do after the 24 hour refrigeration. My go-to pizza recipe has the dough sit for 30 minutes in a warm place before shaping it. Thank you.
Nancy
Barbara, thank you for bringing this to my attention, this has been on our site for sometime with the conflicting instructions, you are the first person to says something, and I appreciate it! I have updated the instructions. As for your question, yes, you need to bring your dough to room temperature before working with it on the floured board. It states in the note: “NOTE: Dough may be refrigerated at this point and stored until ready to use. To store each batch of dough, spray a plastic bag with nonstick spray and place the dough in it. Store no longer than 7 to 10 days, or if frozen for up to 2 months. If refrigerated or frozen prior to use, allow the portions to come to room temperature before they are rolled out.” Hope this helps, and thank you for letting us know. Happy Holidays!
Nancy