 Homemade Strawberry Ice Cream is so delicious! This recipe is my mother’s, Dorothy Hagerman, recipe that she used in the 1960’s for making homemade Strawberry Ice Cream.
While ice cream is readily available in the freezer cases of grocery store and specialty stores, homemade ice cream is in a world of its own. When you make your own, you combine fresh, rich ingredients with the flavorings and add-ins of your choice, for a delectable experience. If you own an electric or hand operated ice cream freezer, making your own ice cream can be fun and easy.
If you don’t have an ice cream maker, you can buy some nice counter-top size ice cream makers from Amazon – affiliate link.
More delicious Ice Cream Recipes and my daughter’s absolutely fantastic Italian Pistachio Gelato.
For a detailed and interesting history of the following individual types of ice cream, check out the underlined ice cream titles: Baked Alaska – Ice Cream and Ices – Ice Cream Cone – Ice Cream Sundae
- 6 tablespoons all-purpose flour
- 3 cups granulated sugar, divided
- 1 teaspoon salt
- 4 cups milk
- 6 eggs
- 1 1/2 pints fresh strawberries
- 2 tablespoons fresh lemon juice
- 4 cups heavy cream or half & half cream*
- 2 tablespoons pure vanilla extract
- Dash of red food coloring (optional)
- Crushed Ice
- Rock salt**
-
In a heavy 3-quart saucepan, combine flour, 2 cups sugar, and salt until well blended (a wire whisk works great). Blend in milk and eggs until well blended. Over medium-low heat, cook, stirring constantly, until the mixture (custard) thickens and will coat the back of a metal spoon with a thin film, approximately 7 to 10 minutes. On your instant-read cooking thermometer, the temperature should reach between 165 and 180 degrees F. NOTE: Do not let the mixture boil or it will curdle. If, of course by accident, your custard base does curdle, immediately remove from heat and place in a blender; process until smooth.
-
The FDA and the USDA advise consumers to use a recipe that contains a cooked custard base when using eggs in your ice cream recipe. The custard base must reach 160 degrees F, measured with a cooking thermometer, to kill the salmonella bacteria. Additionally, it is important to only used pasteurized milk and cream products in making your homemade ice cream.
-
Remove from heat and let custard cool. Cover and refrigerate until thoroughly chilled, at least 2 hours but ideally for 24 hours. NOTE: Cool quickly by setting pan in ice or cold water and stirring for a few minutes. This aging process will give the mixture better whipping qualities and produce ice cream with more body and a smoother texture.
-
In a large bowl using a potato masher, crush strawberries with lemon juice and the remaining 1 cup sugar. Let stand for 1 hour.
-
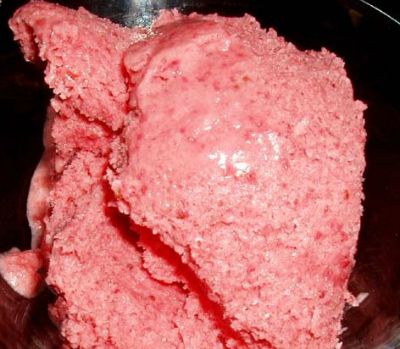
After custard mixture has aged and is well chilled, remove from refrigerator and add and stir together half and half cream, vanilla extract, food coloring (optional), and strawberry mixture. The ice cream mixture is now ready for the freezing process.
-
Transfer the mixture into your ice cream maker can and freeze according to the manufacturer's instructions.
-
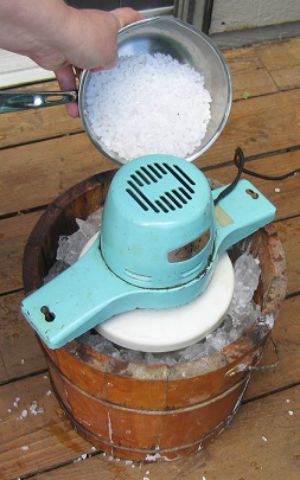
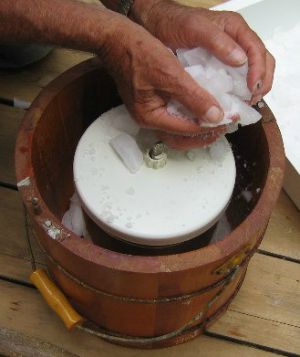
Using salt and ice - The freezing procedure has a two-fold purpose, the removal of heat from the mix and the incorporation of air into the mix. Heat is removed by conduction through the metal to the salt-water brine surrounding the freezing can. To help the ice cream mixture to freeze, the container holding the mixture is surrounded with ice and salt. If you use too much salt, the mixture will freeze too quickly and will not be smooth. If you use too little salt, the ice cream might not even freeze. Unless your ice cream recipe says otherwise, use 1/2 cup rock salt to 4 cups crushed ice.
-

-
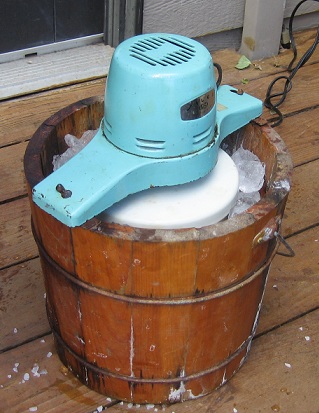
Churning - Good ice cream is determined not only by the taste but also the texture. The continuous churning with the ice cream freezer is important because it adds air into the mixture. this makes the ice cream smooth and increases its final volume.
-
Once you start the churning process, don't stop! If you did stop for a long break, large ice crystals would form in the coldest part of the mixture. this would produce a grainy texture in parts of the ice cream and the center may not even freeze. The continuous churning also distributes the flavorings and brings the un-frozen portions of the mixture to the surface. The ice cream mixture usually takes between 20 to 30 minutes to freeze and the freezing container is then placed into a freezer to allow the ice cream to harden.
-
-
When the ice cream is done, either serve and enjoy or transfer to freezer containers and freeze until firmer. To freeze, put in an airtight plastic container and place in the freezer for at least an hour, preferably several hours.
-
Storing Homemade Ice Cream: Homemade ice cream does not store as well as store-bought ice cream. For best results, transfer leftover homemade ice cream into a plastic airtight container. Store in the freezer for no more than one week. If the texture of the stored ice cream is grainy, let the ice cream soften, then beat it before serving to smooth the texture.
-
Makes a large batch of ice cream.

* Whole milk, half and half cream, and/or low-fat condensed milk may be used to lower the calories (these substitutions may effect how creamy your ice cream will turn out).
** Rock salt – large crystal salt with a gray color, due to minerals not removed from normal table salt. This form of salt is available in most grocery stores, and also through hardware stores.
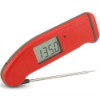 I get many readers asking what cooking/meat thermometer that I prefer and use in my cooking and baking. I, personally, use the Thermapen Thermometer. Originally designed for professional use, the Super-Fast Thermapen Thermometer is used by chefs all over the world. I only endorse a few products, on my web site, that I like and use regularly.
You can learn more or buy yours at: Super-Fast Thermapen Thermometer.
Sponsored Content
If you don’t have an ice cream maker, you can buy some nice counter-top size ice cream makers from Amazon – affiliate link.
2 Responses to “Homemade Strawberry Ice Cream Recipe”
Laura Hawkins
Fabulous, wonderful, and very much a part of our American heritage!
Marie
I’ve been using this ice cream recipe every year since I first found it in 2009. Everyone loves it. It is truly one of the best parts of strawberry season. I also use this as the basis for other ice cream flavors like banana.