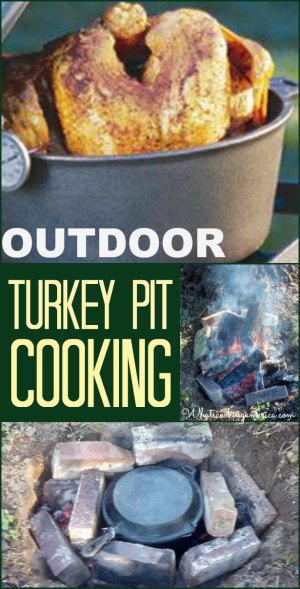
Pit Cooking – Bean Hole Cooking – Turkey Recipe
Outdoor Turkey Pit Cooking Recipe that is a great variation on cooking your holiday turkey.
Serve up this rustic dinner by cooking a whole turkey, pit style when out in the wild camping or river rafting, or for your family’s holiday dinner. This style of pit cooking is also know as “Bean Hole Cooking.” If you have the time and place to cook your holiday turkey in an outdoor pit. This Outdoor Turkey Pit Cooking recipe would make a great Thanksgiving or Christmas turkey dinner.
A pit barbecue is an exercise in turning a hole in the ground into an oven with hot coals provide the heat. Covering the top with aluminum foil and then dirt, regulates the oxygen so the coals burn slowly, providing an even, controlled heat for many hours .
Recipe and photos by Alan Meeker of Hillsboro, Oregon, an avid outdoors’ man in the beautiful Pacific Northwest.
Check out more great Poultry Recipes, Cast-Iron Cooking Recipes, and how to Brine Poultry for a moister and tastier dish.
Check out this very interesting and informative article on Dutch Oven Camp Cooking.
Outdoor Turkey Pit Cooking Recipe – Turkey In The Hole Recipe
Pit Cooking – Bean Hole Cooking – Turkey Recipe
*Cooking Time: 20 minutes per pound.
-
1 (10 pound) turkey, fresh or thawed, with giblets and neck removed.
Turkey Brine, optional*
Butter -
* If you decide to brine your turkey, 1 to 2 days before pit cooking your whole turkey, brine it. Check out Guidelines for Brining Poultry.
-
Equipment Needed: -
Large cast-iron Dutch Oven with lid (see photos on right)
River rocks or bricks (river rock is best)
Metal wire
Aluminum foil
Lots of fire wood
Shovel -
-
Preparing the Hole/Pit:
-
Dig a hole/pit big enough to fit all your rock/bricks and your cast-iron Dutch Oven. Generally 2 to 3 times larger than your Dutch Oven is adequate.
-
Line the hole with flat river rocks.
-
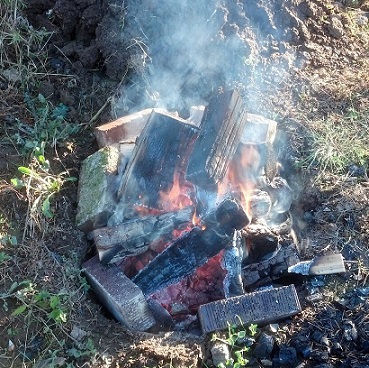
Fill the hole with lots of fire wood. Use hard woods (hardwoods, when burned, hold heat better).
-
Build a fire in the pit and let it burn rapidly for at least 1 hour. Make sure that you burn all the wood down to a big bed of coals. The pit should be almost filled with ashes and coals, approximately 2- to 3-inches deep.
-

-
-
You are now ready for the Dutch Oven with the prepared turkey to be placed in the hole.
-
Using a shovel or Hot Coal Shovel, make room for your Dutch Oven by moving some of the hot coals in the area around where the pot will be.
-
-
Preparing and Cooking the Whole Turkey:
-
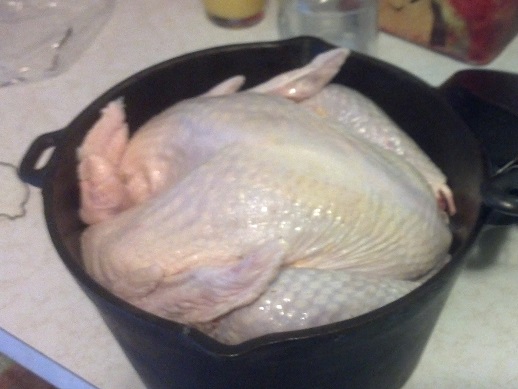
Rub the inside and outside of the turkey with butter. If desired, also rub with your favorite seasoning rub.
-
Place the prepared turkey in the Dutch Oven. Cover with the lid.Make sure you use some heavy wire to attach the lid as this will keep dirt and ash out of your Dutch Oven.
-
-
-
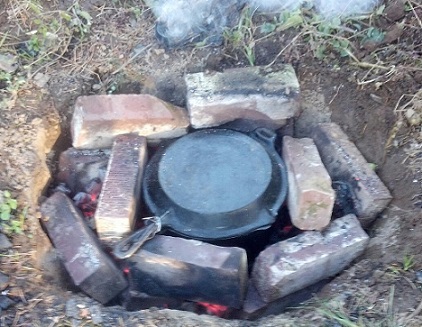
Place the Dutch Oven, with the turkey, in place in the prepared hole.
-
-
-
Using your shovel, move some of the hot ashes and coals on top of the pot. Also take some hot coals out so you can put them on top of the pot over the aluminum foil. Make sure there is some air in the area around the pot.
-
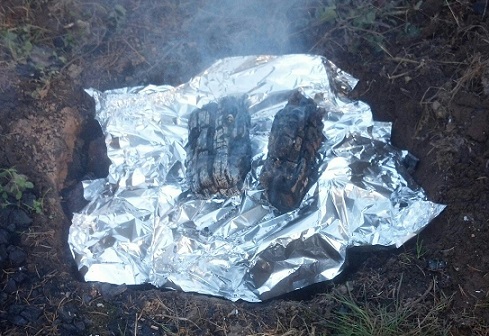
Place aluminum foil over the entire hole. Finally, place some hot coals over the foil and bury the hole with dirt.
-
-
-
Cook the turkey for approximately 4 to 5 hours.
-
Estimate heat of oven – Place your hand about 6 inches over the coals on the lid and count one thousand one; one thousand two; one thousand three. Remove your hand when it is uncomfortable – one is hot, two is moderate, and three is low heat – more you are just warming food not cooking.
-
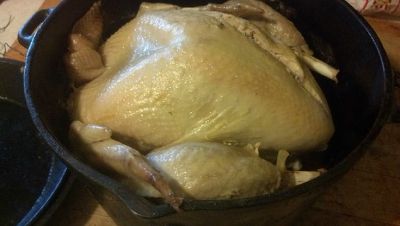
Dig up the Dutch Oven, brush off the dirt and ashes, and remove the lid with a Lid lifter. Be sure to wear oven mitts or Heavy Leather Gloves, as the pot will still be very hot.
-
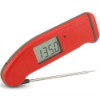
Insert the meat thermometer into the fleshy part of the thigh without touching the bone. You want the internal temperature to reach 165 F (remember that the turkey will continue to cook after it is removed from the heat of the fire). NOTE: The USDA has come up with a one-temperature-suits-all for poultry safety: 165 F. For safety and doneness, the internal temperature should be checked with a meat thermometer.
-
This is the type of cooking and meat thermometer that I prefer and use in my cooking. I get many readers asking what cooking/meat thermometer that I prefer and use in my cooking and baking. I, personally, use the Thermapen Thermometer shown in the photo on the right. To learn more about this excellent thermometer and to also purchase one (if you desire), just click on the underlined: Thermapen Thermometer.
-
If your turkey has not reach the internal temperature of 165 F. after removing it from the cooking hole, place the turkey (in the Dutch Oven) in a preheated 350 degree F. oven and continue to bake until the proper internal temperature is reached. Be careful that you do not lose those wonderful juices. -
Let the turkey rest, out of the pit or oven, for approximately 15 to 20 minutes before carving. Actually, once the turkey has cooled slightly, you can simply pull it apart with your fingers.
-
Categories:
Camping Cooking Lessons - Cooking 101 Dutch Oven Cooking Grilled & Smoked Turkey Turkey Turkey Hints & Tips
One Response to “Outdoor Turkey Pit Cooking Recipe”
ron bean
we wrapped it in foil then put it deep in the coals in the ground with a coat hanger around it, the we ate it with the meat coming off the bone, just falling off: yum