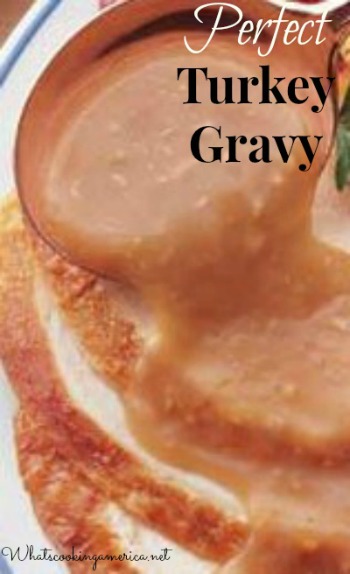
Perfect turkey gravy, made using the turkey giblet stock, pan drippings, and meat juices from the Roasted Turkey, is an essential part of a traditional Thanksgiving dinner. Thanksgiving, dinner would not be complete without turkey gravy!
You can start your turkey gravy the day before Thanksgiving to save time. Make-ahead turkey gravy utilizes the turkey giblets to make a stock. The flavors make a wonderfully rich turkey giblet gravy because the giblet flavors are fused in the stock as it sits overnight. Of course you can cook the giblet stock on the stove top while you are roasting your turkey. Another secret to perfect turkey gravy is to skim off most of the fat from the drippings so the gravy is not greasy.
What should you do with the turkey’s giblets?
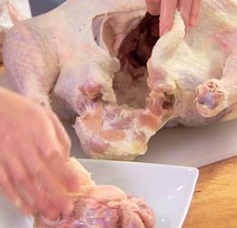 A whole raw turkey is usually packaged with the giblets (sometimes sealed in a bag in the body cavity). The giblet bag in the turkey you buy usually includes the heart, liver, gizzard (a part of the turkey’s stomach), and neck.
Important – whether you are using the giblets or not in your gravy, remember to take them out of your raw turkey.
The USDA recommends cooking giblets separate from the turkey. They are usually packaged in a paper or plastic bag placed inside the cavity of the bird, so you definitely do not want to cook your turkey with the bag still in there.
So – do not fear the giblets, as they make a delicious turkey gravy and are full of flavor and nutrients!
Make a turkey giblet stock – Good gravy requires good stock or broth:
I usually make this stock for the gravy the day before Thanksgiving to save time. Stock can also be made well in advance of Thanksgiving using chicken parts and frozen until time for use.
 Learn how to make Homemade Turkey Stock or Homemade Chicken Stock using a cooked rotisserie chicken.
Rinse giblets and neck and then pat dry. Wrap liver (air-tight) and refrigerate to add later or save for other uses (if you are using). If you simply do not want even a hint of the taste of liver, you can leave it out. Either chop giblets and cut up neck or leave whole (I have done this both ways).
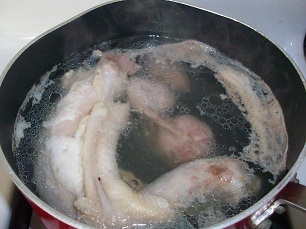
While the turkey is in the oven cooking (or the day before you cook the turkey), cover the giblets, wing tips, and neck bones with approximately 4 cups water in a large 5- to 6-quart pot over high heat. If desired, add a stalk of chopped celery, a chopped carrot, some parsley, and a chopped onion (with its peel as the onion skin gives the broth a golden color).
Bring water just to a boil and then reduce heat and let simmer approximately 1 1/2 hours until giblets are very tender when pierced. You may add the liver at this time (if using) and let simmer an additional 10 minutes. The liver can add a bitter taste, so I do not use it.
Remove from heat and strain broth through a fine strainer into a bowl; discard the cooked vegetables and reserve this giblet broth for making your gravy. Either discard giblets or, if desired, pick meat from neck and wing tips; finely chop all giblets and meat; add to turkey stock when making the gravy.
Refrigerate prepared broth until ready to use.
After the turkey is done roasting:
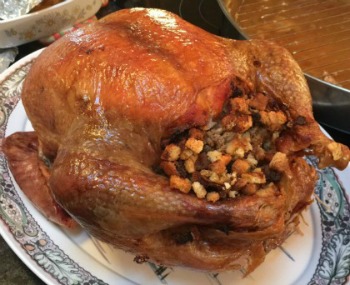 Remove the cooked turkey and rack from the roasting pan. Transfer turkey to a Cutting Board (with a well at one end to collect juices) and let the turkey rest before carving. While the turkey is resting, make the gravy.
Place roasting pan (with the drippings and fat) over two (2) burners on your stove top over medium heat (always make the gravy in the same pan you used to roast the turkey).
Skim and discard any excess fat from the juices in the roasting pan. See Turkey Gravy Ingredients below for amount of fat to use in your gravy. An easy way to remove the fat is to pour the turkey juices and fat into a tall measuring cup or bowl. The fat will float to the top of the bowl. Either skim off the fat with a ladle or use a fat separator. You can also use a turkey baster to remove the broth from under the fat layer. All you need is 3 to 4 tablespoons of fat in the turkey roasting pan to make the gravy; discard the remaining fat.
For the best turkey pan gravy use a heavy spoon to scrape all the dark drippings and any crunchy bits from the sides and bottom of roasting pan. Leave them in your roasting pan as these are what add great flavor and a nice rich color to the gravy.
Add the prepared Turkey Giblet Stock, that you previously made (see Turkey Giblet Stock above), to the roasting pan to add additional rich flavor to the turkey gravy recipe below.
For each 2 cups gravy desired - use 3 tablespoons fat, 3 tablespoons all-purpose flour, and 2 to 3 cups of liquid (depending on how thick you want your gravy.)
-
After you have removed the turkey from the oven and set it aside to rest, place roasting pan (with the drippings and the 3 tablespoons of fat) over two (2) burners on your stovetop over medium heat (always make the gravy in the same roasting pan you used to roast the turkey).
-
Before making the gravy, heat the liquid (juices) you will be using until just boiling, then reduce heat to low to keep the liquid warm.
-
-
No More Whisking Lumps out of the Gravy Mixture - Make a Slurry or Roux:
-
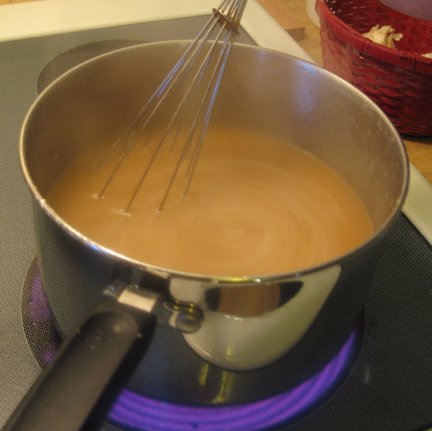
In a separate container with a lid, shake together the all-purpose flour needed and about 2 cups cool water (or use food processor to blend roux.) Adding this thickened slurry (flour mixture) to the reserved pan juices helps to prevent lumps from forming when making your gravy. I always make a little extra of this flour/water mixture just in case I need it.
-
Once the liquid, drippings, and the fat in the roasting pan are lightly bubbling, slowly add the above slurry mixture to the gravy pan, stirring constantly. When the mixture starts to thicken, immediately stop adding the remaining flour mixture. You may not need to use the the entire flour mixture depending on how much or little drippings were in the pan. If lumps do develop, you should be able to use a wire whisk to remove them.
-
Once the slurry mixture is whisked in the gravy, if the gravy seems to thick, just whisk in additional water, a little at a time until desired consistency is reached.
-
Cooking the Gravy: Simmer gently about 10 minutes to cook the flour all the way through (undercooked flour gives off a raw taste). Add salt and pepper (and any other seasonings you desire) to taste. You now have perfect turkey gravy!
-
Serving the Gravy: Pour the gravy into a warmed sauceboat, gravy boat, or wide-mouthed pitcher for serving. Remember that gravy will continue to thicken after it has been removed from the heat. Since I usually make a large amount of gravy for my family, I have found that glass beer pitchers make a good serving container. Always place a plate under the serving container to catch any drips.
-
-
* See below on how easy it is to make Gluten-Free Turkey Gravy.
** Use the reserved poultry juices from the turkey with either vegetable juice, potato juice (from boiling potatoes when making mashed potatoes), prepared turkey/chicken stock, and/or water. I always save some of the water from boiling the potatoes. Any type of liquid can be added to make gravy, but always use the juices/drippings from the roasting pan and prepared turkey stock (see above) to make your turkey gravy. Add other liquids as needed for flavor and quantity of gravy. I like to make a Homemade Chicken Stock in advance of Thanksgiving to use in the gravy.
*** If you don't have enough fat from the turkey, add some butter.
 Gluten-Free (Celiac Diet) Turkey Gravy Recipe:
Gluten-free turkey gravy is easy to make and so good! In fact, even if you do not have to eat gluten free, you will enjoy gluten-free gravy. This gravy is just as delicious as wheat-based gravy.
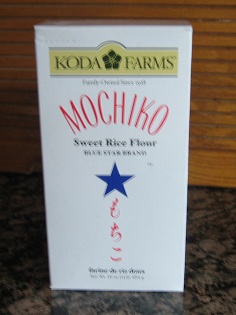
You do not need a special mix to make gluten-free turkey gravy. Just follow the above recipe for making Turkey Gravy, but substitute sweet rice flour (also known as sushi rice flour and Mochiko rice flour) for the all-purpose flour.
Sweet rice flour or Mochiko flour is NOT the same as rice flour, and it is also not sweet. Mochiko flour is available in Asian stores and some large supermarkets. It comes in 1-pound (16 ounce) boxes (see photo on right).
Be sure and follow the directions above for making a slurry when using the sweet rice flour.
Other possible flour substitutions – quinoa flour, potato flour, cornstarch (arrowroot powder).
Gravy Troubleshooting Tips:
 Gravy is greasy – If gravy seems greasy, a fat separator should eliminate this problem. If you discover that your gravy is oily toward the end of its preparation, skim off as much fat as possible with a wide-bowled spoon.
Gravy is doughy – If gravy has a doughy or chalky taste, make sure the flour has been cooked long enough. When the flour is added to the pan drippings or butter, whisk constantly while the mixture cooks until it turns a deep golden brown and smells nutty. If the gravy tastes floury when you are almost finished, turn up the heat to maintain a rapid simmer for several minutes; then thin it again with more stock or water if necessary.
Lumpy gravy – Do not worry if your gravy has lumps. Just strain the gravy just before serving, using a fine sieve; discard solids. Another quick method is to place the lumpy gravy in your food processor or blender and process until smooth. This is my favorite technique or trick.
Thin gravy – If gravy is too thin (not thick enough), simmer over medium-high heat, allowing the liquid to reduce more. Thin gravy can be easily thickened by adding a mixture of either flour and water or cornstarch and water, which has been mixed to a smooth paste. Add gradually, stirring constantly, while bringing to a boil. Continue to cook and stir to eliminate the flour flavor. You can also blend 1 teaspoon of flour per cup of cold water, and then mix into the prepared gravy. Continue to cook and stir to eliminate the flour flavor.
Thick gravy – If gravy is too thick, gradually whisk in additional stock or water (a little at a time) into the gravy until it reaches desired consistency.
No flavor – If gravy lacks flavor, you should adjust seasoning as necessary with coarse salt and freshly-ground pepper.
If you use canned stock instead of homemade, the gravy might lack depth of flavor. Homemade stock, even made with chicken rather than turkey, will produce a superior gravy – so it’s worth the effort. A trick that I use, is to cook a whole chicken in water a day or two before Thanksgiving for our dinner. I use the chicken meat for that night’s dinner and refrigerate the chicken stock until Thanksgiving day to use in my gravy.
Salty gravy – If the over salting is severe, the gravy must be repaired by increasing the quantity of gravy. Prepare another batch of gravy, omitting all salt. Blend the two batches together.
Gravy too light in color – If you brown the flour well before adding the liquid when making gravy, you will avoid pale or lumpy gravy.
How To Brown Flour: Spread desired amount of flour in a pan. In a preheated 400 degrees F. oven, cook flour for 30 minutes. Stir well and continue cooking until flour is the color you desire. Remove from oven and let cool. Before using, stir again.
You can also make dark gravy with un-flour by making a dark roux. A roux is a thickener made from equal amounts of fat and flour. Heat the fat, add the flour, and cook over medium heat, stirring constantly until the roux becomes a deep brown. When making gravy with the roux, it will not thicken as well, so you will need more of it.
If all the above tips fail in getting your gravy to brown to a rich color or you just want a quick and easy solution, add 1/8 teaspoon instant coffee granules and stir to blend.
7 Different Ways to Cook a Turkey:
Barbecued Turkey
Outdoor barbecuing or grilling is a very easy and efficient way to cook your Thanksgiving turkey. No mess in your oven or the kitchen. Your turkey will be crisp outside and juicy inside.
Cajun Fried Turkey
This way of cooking your turkey is anything but greasy as the deep-frying process seals the outside and the turkey remains incredibly juicy, while the skin gets wonderfully crispy.
Outdoor Turkey Pit Cooking Recipe – Turkey In the Hole Recipe
This style of pit cooking is also know as “Bean Hold Cooking.” If you have the time and place to cook your holiday turkey in an outdoor pit, wouldn’t this make a great Thanksgiving or Christmas turkey dinner.
Oven Roasted Turkey
It is hard to beat the classic roast turkey with the wonderful aromas that waft from the oven kicking off the anticipation for the holiday meal. Roasting a large turkey is one of easiest ways to accommodate a large crowd of family and friends.
Smoked Turkey
Smoking a turkey is no different from barbecuing in your back yard. You follow all these rules without even noticing them in most cases so go ahead, give it a try, you will not be dissatisfied when you try a smoked turkey.
Turducken
What the heck is that? Well it is a de-boned turkey (except for wing bones and drumsticks), a fully hand deboned duck, and a fully hand deboned chicken, all rolled into one.
Tofurky/Tofurkey Recipe with Vegan Gravy
I am not a vegetarian or a vegan, but I have several family members who are. For them and my many readers who are also vegetarians or vegans, I created this page on how to cook Tofurky.
Turkey Dinner Information:
Turkey Basics
How to purchase, stuff, and roast a turkey – Choosing a fresh or frozen turkey – How to thaw a frozen turkey – How to prepare turkey for stuffing.
Guidelines for Brining Poultry
This is the secret that chefs never tell you about. It’s very easy and economical, and requires no special cookware. Brining is like a marinade, as it keeps food moist and tender.
Let’s Make Turkey Stock
Don’t throw out those leftover turkey bones! My favorite thing to do the morning after Thanksgiving is to make homemade turkey stock from the turkey carcass. It is so easy to do and so delicious!
Linda’s Favorite Turkey Stuffing
Whether you call it “stuffing” or “dressing,” what’s not to love about turkey stuffing? Everyone knows that stuffing is the best part of a turkey dinner!
Make Ahead Mashed Potatoes
Save your valuable kitchen time on Thanksgiving day by using this easy-to-make mashed potato dish for your next Thanksgiving dinner. This is the recipe I use every year for Thanksgiving Dinner.
Using a Cooking or Meat Thermometer
Have you ever cut into a turkey to see if it has finished cooking? You DEFINITELY need to use a cooking thermometer! A cooking thermometer or meat thermometer should not be a “sometime thing.” Use it every time you prepare foods like poultry, roasts, hams, casseroles, meat loaves and egg dishes.
Internal Temperature Cooking Charts – Cooking thermometers take the guesswork out of cooking, as they measure the internal temperatures of your cooked meat, poultry, seafood, baked goods, and/or casseroles, to assure that a safe temperature has been reached, harmful bacteria have been destroyed, and your food is cooked perfectly. Always follow internal cooking temperatures to be safe!
Advice on Handling Leftovers Safely
Leftover” foods are cooked foods that you or your family do not eat within 2 hours after they are cooked. The chance of food poisoning increases the longer you store a food after it is cooked. Improper handling or storing cooked food is one of the most common causes of food poisoning in the home.
Categories:
Christmas Cooking Lessons - Cooking 101 Gravy Recipes Holiday Turkey Dinners Thanksgiving Thanksgiving Hints & Tips TurkeyComments and Reviews
Leave a Reply