How To Purchase Wood Cutting Boards:
Buy the best wood cutting boards you can afford, take care of it, and it is likely that your grandchildren will be using it. Even as cutting boards age, or especially as they age, good wooden cutting boards become more and more attractive.
Size of Cutting Boards:
Your first consideration should be how much counter space you have. Every kitchen should have at least one large cutting board. The bigger the board, the less you will find yourself fussing as the larger surface area of a cutting board gives you more space to work with. You are likely to leave it where it sits, as a good-size cutting board weighs a good deal. So buy a cutting board that fits your counter space.
A stylish wood cutting board may also enhance the look of your kitchen. Small cutting boards are convenient for clean up and cutting small things quickly (for example a garnish or some cheese).
Shape and Thickness of Cutting Boards:
The second question is which shape works best for you? Your main choices are rectangular, square, or round. Be sure that if you buy a cutting board that is several inches thick, its surface does not sit so high on your counter top that you can not cut on it comfortably. Do not choose style over substance.
Types of Wood Cutting Boards:
End-Grain Cutting Boards (reversible):
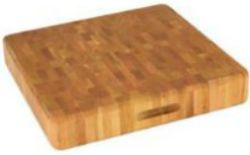 End-Grain Cutting Boards are the best cutting boards to be found and will meet the needs of the most discerning customer. More durable than regular cutting boards, these end-grain boards look beautiful on your counter top. An end-grain is a much harder surface and has a greater tolerance for the chopping motion. These boards give a truly resistant cutting surface while being kind to the blade’s sharp edge.
The old fashioned cutting boards were always end-grain design (the chopping block) for a reason, it keeps the knives much sharper. Instead of crushing against the wood fibers the blade goes between them much like cutting into a firm brush. You will find that your blade edges last much longer, and you will see no knife marks on the board.
When the individual boards of wood are arranged so that the grain of the wood runs vertically (up and down), this puts one end of each board up so that the cutting surface is actually the end of many individual pieces of hardwood. With the grain aligned in this manner (up and down), when the knife strikes the surface during cutting, the grain of the wood actually separates and then closes when the knife is removed. This accounts for the self-healing aspect of the end-grain surface. The wood itself is not cut, but instead you are cutting between the fibers.
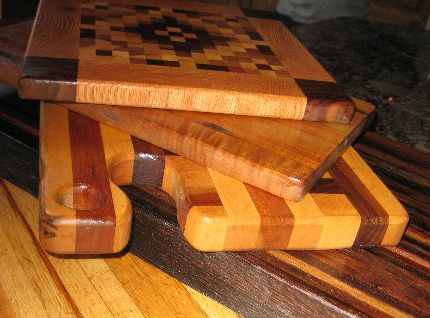
Flat-Grain (Edge) Cutting Boards (reversible):
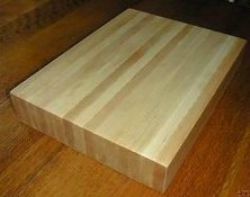 Flat-Grain Cutting Boards are also one of the best-selling cutting boards for the kitchen – excellent value chopping board and the perfect companion in the kitchen.
The majority of wood cutting boards you can buy today are flat grain design. The main reason for this is that they are significantly easier to manufacture.
Wood vs. Plastic Cutting Boards
Which is better – Wood or Plastic?
There is much debate on this topic, and I, Linda Stradley, can make no claim one way or the other on this subject.
It is said that bacteria have a tougher time surviving on wood boards. Most people are surprised to hear that a wood cutting board may be more resistant to bacterial buildup than plastic ones. Research has shown that bacteria, such as the salmonella often found on raw chicken, will thrive and multiply if not removed from plastic boards (because germs that cause food poisoning can hide out in the knife-scarred nooks and crannies that develop on the surface of a plastic cutting board). Hand scrubbing with hot water and soap can clear microbes from the surface of new or used wooden cutting boards and new plastic ones, but knife-scared plastic boards are resistant to decontamination by hand washing.
Research and Studies to read:
One study reported that new wooden boards had antimicrobial qualities while plastic cutting boards trapped bacteria. Source: – Plastic and Wooden Cutting Boards, by Dean O. Cliver, Ph.D
Although the Food and Drug Administration has long recommended plastic cutting boards, based on the observation that it not as hard to clean plastic as porous wood, new information shows that wood cutting boards are actually safer than the plastic or so-called anti-bacterial kind. – Source: Which Cutting Board is Safest?, by Patrick J. Bird, University of Florida, College of Health and Human Performance.
The Agricultural Research Service (ARS) of the United States Department of Agriculture has concluded that the use of plastic cutting boards over those made of wood is still the best approach.
Yes, the conflicting studies are confusing!
The following is what I, Linda Stradley, do to maintain food safety in my kitchen: When cutting up meat, seafood, or poultry, I place a plastic cutting board on top of my wood cutting board. I do not cut meat, seafood, and poultry directly on my wood cutting board. I use my wood cutting board for everything else.
Cross Contamination of Food – Cross-contamination of food can expose a safe food product to contamination by harmful microorganisms.
The Meat and Poultry Hotline recommends that consumers use plastic or glass surfaces for cutting raw meat and poultry. However, wooden cutting boards used “exclusively” for raw meat and poultry are acceptable. Use a different board for cutting other foods such as produce and bread. This will prevent bacteria from a meat or poultry from contaminating another food. To prevent cross contamination of food, use separate cutting boards for raw meats and produce or clean/sanitize cutting boards when switching between types of food products (e.g., from raw meats to produce, from raw foods to cooked). Color-coded plastic cutting boards or mats are a useful way to prevent cross-contamination (e.g., red for meat, green for produce, yellow for poultry).
NOTE: I like to use the small flexible plastic cutting boards or mats on top of my wood cutting board when cutting up raw meat. These plastic mats can be put into your dishwasher after using. They can also be easily bent, used as a funnel, or cut to any desired shape.
I can also place my plastic boards in the dishwasher for cleaning. No matter what type or types of cutting boards you use, keep them clean! Please read the section Maintaining and Sanitizing Cutting Boards.
How To Season Wood Cutting Boards:
Cutting Board Oils – Bucher Block Oils:
Before using a new butcher block, season it to prevent staining and absorption of food odors and bacteria. Proper surface treatment is important to guard against germs and/or mold growth on both new and older boards. The wood surface needs an oil that can be repeatedly applied to fill the wood pores and repel food particles, liquids, and oils. Never use any vegetable or cooking oils to treat or finish a cutting surface, as in time the wood will reek of a rancid spoiled oil odor.
USP-grade mineral oil is a popular choice as it is the cheapest pure food-grade oil you can buy (do not use vegetable or olive oils because they can turn rancid). Mineral oil remains safe throughout its life. There are various oils available for cutting boards and butcher blocks. Some are called “Butcher Block Finishes” or “Mystery Oil.” Save some money by visiting the local hardware or drug store and purchasing Mineral Oil (not mineral spirits – this is paint thinner).
When you see the words “food safe finish” in a description of a wood product, this generally means mineral oil has been used. Simply wipe mineral oil on the surface of your board and watch it soak in. When the wood will not take any more oil, you can wipe off the excess with a clean dry cloth. Do not worry about applying too much oil – more is better.
Beeswax is often added to mineral oil and walnut oil to give a tougher finish. The wax of bees has been used for centuries for waterproofing and sealing materials from baskets to cloth and for preserving foods and other perishable materials, including wood. It will make wood water-resistant (though not water-proof) and will help protect the wood surface from use and wear. It will also give a wood surface a nice smooth feel to the touch and leave a gentle, sweet fragrance. Simply shave about 1/2 teaspoon beeswax into a microwave safe dish with a cupful of mineral oil; microwave on high for about 45 seconds. Apply to the cutting board or butcher block while still warm.
Beeswax Top Coat – A beeswax top coat is an optional addition to the re-finishing process, but is well worth the time. The beeswax sits on the surface of the wood in contrast to the oil that soaks into the wood. As a result the beeswax fills in pores and gaps that thin oil can not bridge. This helps to keep moisture, bacteria, and other contaminants from getting into the wood surface. To apply the finish, simply wipe it on with a clean cloth. The beeswax is a soft paste that has a similar consistency to that of a shoe polish. Excess finish can be easily buffed off with the cloth. Once the finish has had some time to dry it can be buffed to a shine.
Walnut Oil or Almond Oil – These are all-natural oils and are one of the few oils that do not turn rancid as easily as other oils. However, all vegetable oils will go rancid eventually. I, personally, do n’o recommend using these oils. These oils are available in grocery stores and some mail order woodworking supply stores. NOTE: If anyone in your family has an allergy to nuts or nut products, do NOT use these oils.
Coconut Oil. I recently did some research and experimentation and found out that food-grade coconut oil/butter also works great. I also use it for seasoning my Cast-Iron Pots and Pans. Coconut oil is one of the most stable oils and is highly resistant to rancidity. It is stable because of its high proportion of saturated fats. Coconut oil has a long shelf life of two or more years, and does not have to be refrigerated. Coconut oil should be stored out of direct sunlight. If you live in a hot climate, I recommend storing unused coconut oil in the refrigerator.
Applying Oils: Before applying oil to butcher block, warm the oil slightly. Apply oil with a soft cloth, in the direction of the grain, allowing the oil to soak in between each of the four or five coats required for the initial seasoning. After each treatment, wait about four to six hours and wipe off oil that did not soak into the wood (oxidation or hardening of the oil will take approximately 6 hours). Re-oil the butcher block monthly or as often as needed.
How To Maintain and Sanitize Wood Cutting Boards:
Caution must be taken when using any type of cutting board. Here are some safety tips to keep in mind:
Whichever kind of cutting board you use, all cutting boards should be cleaned and sanitized frequently. Some of the various techniques recommended for cutting boards are as follows (you decide which is best):
Hot water and soap – Scrub board with hot water and soap. Rinse and dry thoroughly. NOTE: NEVER submerge cutting boards in a sink of water! Wood is porous and will soak up water causing the cutting board to crack when it dries.
Vinegar – To disinfect and clean your wood cutting boards or butcher block countertop, wipe them with full-strength white vinegar after each use. The acetic acid in the vinegar is a good disinfectant, effective against such harmful bugs as E. coli, Salmonella, and Staphylococcus. Vinegar is especially good for people with chemical allergies. Keep a spray bottle of undiluted vinegar handy for easy cleaning and sanitizing.
To learn more about studies using vinegar for disinfecting cutting boards, check out this very interesting scientific article: The Microbiology of Cleaning and Sanitizing a Cutting Board, by O. Peter Snyder, Jr., Ph.D.
Hydrogen Peroxide – 3% hydrogen peroxide can also be used as a bacteria-killer. To kill the germs on your cutting board, use a paper towel to wipe the board down with vinegar, then use another paper towel to wipe it with hydrogen peroxide.
Bleach – Sanitize both wood and plastic cutting boards with a diluted chlorine bleach or vinegar solution consisting of one teaspoon of liquid chlorine bleach in one quart of water or a one to five dilution of vinegar. Flood the surface with a sanitizing solution and allow it to stand for several minutes, then rinse and air dry or pat dry with paper towels.
To eliminate garlic, onion, fish, or other smells from your cutting board:
Coarse salt or baking soda – Rub the board with course salt or baking soda. Let stand a few minutes and wipe salt or baking soda from board, and then rinse. You may need to re-season after rinsing your cutting board/chopping block.
Lemon – Another very easy technique is to rub fresh lemon juice or rub a cut lemon over the surface of the cutting board to neutralize onion and garlic odors. You may need to re-season after rinsing your cutting board/chopping block.
Vinegar – Keep a spray bottle of undiluted vinegar handy for easy cleaning and sanitizing. You may need to re-season after rinsing your cutting board/chopping block.
Use a good steel scraper or spatula often when using the board. Scraping removes 75% of the moisture that builds up on a wooden cutting board. An occasional sanding will return a wooden board to a smooth luster. But never scrub a wooden board with a steel brush (a steel brush will ruff up the finish and should be avoided).
Re-Seasoning: Wooden boards need oiling or re-seasoning once a week to seal the grain against bacteria. An oil finish helps to prevent the wood from cracking or pulling apart at the seams. See Seasoning Cutting Board above.
Before applying oil to butcher block, warm the oil slightly. Apply oil with a soft cloth, in the direction of the grain, allowing the oil to soak in. Allow oil to soak in a few minutes, then remove all surface oil with a dry, clean cloth. When applied, mineral oil seals the pores of the wood blocking the penetration of moisture.
Sanding: When refinishing a butcher block, you may wish to sand the surface of the wood to remove old stains, scratches and marks. When sanding out kicks and scratches, remember that if you don’t sand the top evenly you will end up with “hills” and “valleys” in the top.
All cutting boards, and other food surfaces, should be kept dry when not in use. Resident bacteria survive no more than a few hours without moisture. Keep moisture of any type from standing on the block for long periods of time. Beware of moisture collecting beneath the board if you leave it on the counter. If you can, prop one end up when not using your board.
Guidelines To Increase Food Safety Using Wood Cutting Boards:
From the Food Safety and Inspection Service USDA – Basics for Handling Food Safely – USDA
Choose a board with a smooth, hard surface. It should be approved for contact with food.
Replace cutting boards that become deeply scratched, carved or grooved.
Do not chop salad, vegetables or other ready-to-eat foods on an unwashed cutting board that’s been used to trim raw meat, poultry or seafood. If possible, always use a clean, separate, color-coded cutting board for fresh vegetables, fruits, breads, and other food that will not be cooked prior to eating.
Scrape off any stuck food and scrub all cutting boards completely with hot soapy water after each use. Dishwashers are usually very good cleaners for most cutting boards. However, thin plastic or wooden boards may be damaged.
Sanitize cutting boards from time-to-time with a mixture of one teaspoon of chlorine bleach to one quart of water. Flood the board with the mixture; let it stand a few minutes. Then, rinse completely with fresh water. For better food safety, sanitize washed cutting boards after using with raw meat, poultry, and seafood. This may be especially important for households with ill family members.
Let cutting boards dry completely; do not stack together or with other kitchen gear so that they remain wet.
Store cutting boards so that they stay clean, dry, and do not touch raw meat, poultry or seafood or their drippings.
5 Responses to “Wood Cutting Boards – Chopping Blocks – Butcher Blocks”
Rick Shinkle
Ecellent article. Full of good information
Val
Just wondering what is the best wood to use for a cutting board as my husband has wood that’s been drying for 40 years and I asked him if he could make me a cutting board most of his wood I think are burls from the wood
Nancy
First off, do your research as some woods are toxic. You will want to use a hardwood from a tree that bears edible fruit. From there, you need to decide based on what you want to use your board for as to what type of wood to choose. I would research a lot about the type of wood you have available to be sure it is a good choice to make a cutting board from.
Wild Wood
Great content and nailed all the necessary tips when choosing cutting and chopping boards.
Nancy
Thank you and your boards and bowls are beautiful. Contact me if you want to collaborate.