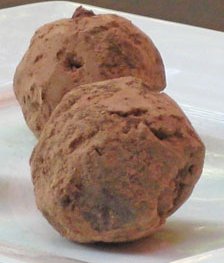
You thought Chocolate Dipped Strawberries were great, now you must try these Chocolate Covered Grape Truffles! I have discovered that men go crazy over these Chocolate Grapes! Grapes and chocolate are favorites of mine. Together like this, they are divine.
These chocolate grape truffles will definitely make a speculator finish to any dinner party and great for serving at your wine tastings. I was surprised how easy and fast it was to make this recipe. These are so simple to make for guests – and you make them ahead of time. They were a big hit at a recent wine tasting. Give them a try!
Did you know On New Year’s Eve, Spaniards pop a grape for each stroke of midnight? Each grape represents a month in the year ahead. A bitter grape is a month to beware of! With Chocolate Grape Truffles, every month is sure to be sweet!.
-
Line a large baking sheet with a silicone mat or parchment paper.
-
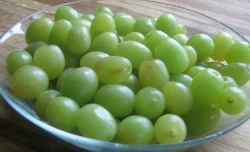
Wash and thoroughly dry the grapes well with paper towels; place in a bowl large enough to toss them easily; refrigerate until well chilled before coating with chocolate.

-
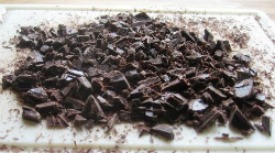
Cut chocolate into small pieces for easier melting.
-
In the top of a double boiler over hot water, not boiling water (do not let the bottom of the bowl touch the water), melt chocolate; stirring until smooth. Be careful as boiling water may cause steam droplets to get into chocolate which can result in "seizing," when the chocolate becomes stiff and grainy.
-
NOTE: If you do not have a double boiler you can improvise one by placing a glass or stainless steel bowl over a pot of simmering water.
-
Remove from heat. Let the chocolate cool slightly (body temperature), but it should not set.
-
Using a rubber spatula, stir and add the melted chocolate to the grapes, 1 tablespoon at a time. Carefully scraping down the sides of the bowl and stirring through the center of the grapes so that they are evenly coated.
-
Note: This process was so easy to do. I was afraid that the grapes would stick to each other, but they did not - they kept separate.
-
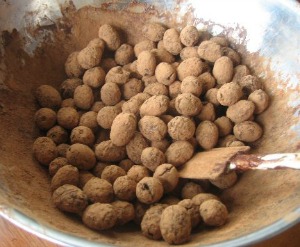
As the chocolate begins to set (which will be almost immediately), place the cocoa powder in a small strainer and sift or shake the cocoa powder, little by little, over the surface of the grapes. Gently toss or stir the grapes as you continue to sift until all of the grapes are well coated and separated.
-
NOTE: This was also very easy to do. The whole process of coating the grapes with chocolate and then the cocoa powder only took about 5 minutes from start to finish.
-
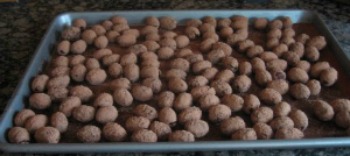
Spread the grapes on the prepared baking sheet, cover with plastic wrap and refrigerate until the chocolate has completely set and you are ready to serve.
-
NOTE: I made the first batch of chocolate grapes a day before needing them. I just spread them on a baking sheet, lightly covered with plastic wrap, and then refrigerated until ready to serve. The second batch, I made the same day that I served them. Both batches were excellent!


* Use a good-quality chocolate. The taste and quality of these truffles are dependent on the quality of chocolate you start with.
Source: This outstanding recipe and some of the photos (the ones on the top of the web page) are from the cookbook, Happy in the Kitchen, by Michel Richard. The remainder of the photos were taken in my kitchen as I made these delicious Chocolate-Covered Grape Truffles.
Categories:
Candy Truffles Chocolate and Bark Candies Chocolate Recipes Dessert Recipes Grape Appetizers Grapes New Years Eve/Day Spanish Summer