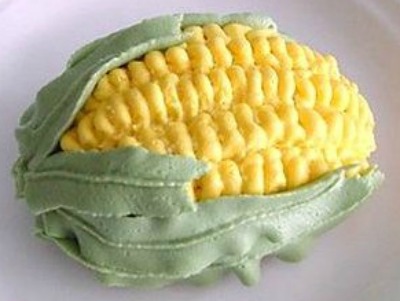
Ear of Corn Cupcakes Recipe
By Peggy Weaver
Since Fall is the best time of year for corn on the cob, I decided that I should make these delightful Ear of Corn Cupcakes for my family. Ear of Corn Cupcakes are a great whimsical cupcake that your family is sure to love. I also like to find more uses for specialty pans that I have purchased – so for this cupcake, we are going to use for the Mini Easter Egg pan.
- 1 box cake mix (I prefer to use a white or butter cake mix)
- Batch of Buttercream Icing
- Food Gel Color - Lemon Yellow, Egg Yellow, and Avocado
- Decorating Tips #6 and #67
- 2 Couplers
- 2 Piping Bags
- Mini Easter Egg Pans
-
Preheat oven to 325 degrees F.
-
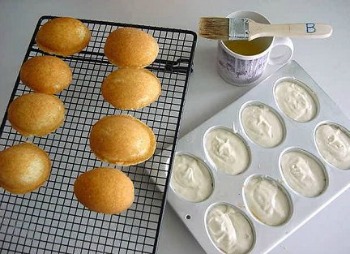
Bake the cakes, according to package instructions, in a well-greased mini egg molds, for approximately 16 minutes. Do a toothpick test to be sure the cakes are baked, but please do not over bake.
-
I found that if you filled the cake pans to no more than 2/3 full you would not have too much of an overflow problem.
-

-
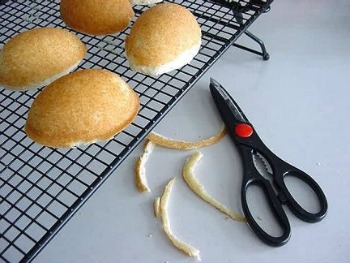
If cupcake batter does overflow and give you an edge, just carefully trim off the edge with a pair of shears.
-
-
I got 29 cake eggs from the cake mix - but I only decorated 20 cakes. Allow to cool thoroughly.
-
-
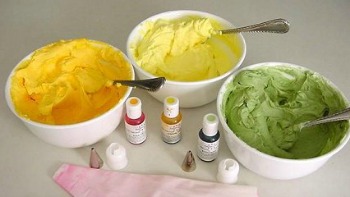
Prepare and divide the prepared Buttercream Icing into three (3) bowls.
-
Color one part with the lemon food coloring gel to the shade of a light lemon color.
-
Color the second batch a rich egg yellow.
-
Color the third batch into a rich shade of avocado green.
-
-
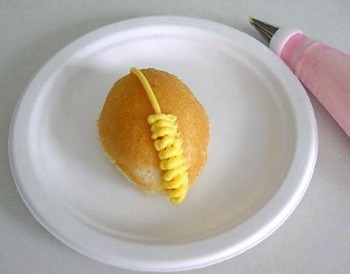
Prepare one of the bags with the #6 tip. Fill piping bag with alternating tablespoons of the two (2) different yellow shades of icing. The Buttercream Icing will flow out combining the two shades for a great corn kernel look.
-
-
Prepare the second piping bag with the #67 tip and fill with the avocado green icing.
-
Place your cupcakes on individual plates and pipe directly on the cake or place on an individual doily so that you can move the cakes with ease later on.
-
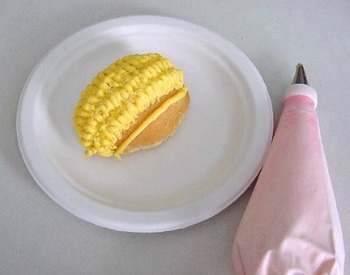
Draw a yellow stripe down the long center of the cake. Pipe the icing over the strip to represent the corn kernels. Place them close together so that they are barely touching for the best look.
-
-
I found that a total of five (5) rows of kernels was what I usually piped.
-
Occasionally I did need to pipe an additional 2 rows to fill up the center area.
-
Look at the photo below. For the outer two (2) rows, I did not need to pipe the stripe. I simply piped a "figure 9 shape" and pushed the leg of the 9 into the cakes surface to attach it well.

Back to: Peggy’s Baking Corner Home Page

Peggy Weaver, author of Peggy’s Baking Corner, has generously answered all the question on cake baking during the last 15 years. Peggy will not be able to continue with the Question and Answer pages in the future. She thanks you for all your interesting questions.
Check out some of Peggy Weaver’s many Cake Decorating Articles, Tutorials, and Q&A pages below.
Fondant Icing/Covering:
Fondant Icing 101
Recipe and Tutorial on making & using fondant icing
Covering Cakes with Fondant Icing
Decorating Cakes with Fondant Icing
Fondant does not freeze well at all, as a matter of fact, downright lousy. Do not even think about refrigerating it either. The condensation that can occur when you defrost or bring to room temp can destroy the finish of the fondant.
Now, if you are going to freeze the cake, as many folks do until the first anniversary, yes go ahead and freeze. The cake will not look as beautiful as it did originally but you just have to keep the idea in mind that it was perfect on the day of the wedding.
Buttercream Icing/Covering:
Buttercream Icing 101
Recipe and Tutorial on making & using buttercream icing
Wedding Cakes:
Assembling Cakes/Wedding Cakes
Covering Wedding Cakes with Fondant
Other Cake Baking and Decoration Topics:
Peggy’s Cake Decorating Idea Photos
The idea page has photos only and no detailed decorating instructions.