Baked Caramelized onions are one of my favorite foods to use in my cooking and to eat. They are so good that you can eat them right out of the bowl as they practically melt in your mouth!
It is easy to caramelize onions, especially when you use my oven-baked method. The benefit of the oven-baked method is it cuts down on the constant stirring time required when you have to stand over your stove top to caramelize. The baking method allows you to walk away to work on other things and just check and stir every 15 minutes. You just need the time and a little bit of patience for the cooking process.
For more great Low Fat Recipes, Low Calorie Recipes, Low Carbohydrate recipes, and Diabetic Recipes, check out my Diet Recipe Index. Also check out my Nutritional Chart for fat grams, fiber grams, and calories for all your favorite foods.
Learn about Onion Hints, Tips, and Information.
- 5 pounds (about 5 to 6 large) yellow onions (brown-skin)
- 1/4 cup vegetable oil
- 1 tablespoon salt
-
Preheat oven to 400 degrees F.

-
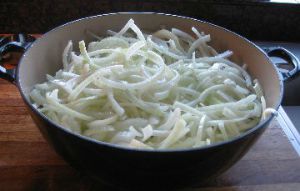
Cut off the stem and root ends of the onions, then halve then lengthwise, and peel away the dried brown skin. Cut the onions into 1/4-inch slices. It is important to have all the onion slices roughly the same size so they cook evenly.
-
Place all the onion slices in a large, heavy pot or Dutch oven (I like to spray the inside of my pot with non-stick vegetable spray).
-
At this point, your pot will be full of sliced onions, but the onions will wilt and shrink dramatically during the cooking process. Toss the sliced onions with the vegetable oil and salt to help draw out the moisture and to keep them from sticking to the pot. Cover the pot and place in the preheated oven.
-
Set your timer for 15 minutes. After 15 minutes, open the oven, remove the lid, and the stir the onions well (scrape all sides of the pot and make sure you get all the bits and pieces - stir the onions well). Cover with lid and return to the oven. Repeat this 15 minutes process for approximately 2 to 2 1/2 hours. Watch the onions shrink and the color change to a reddish-brown.
-
After you reach the 2-hour point, your onions will have almost no water left and will have darkened and taste sweet. NOTE: If you feel you have too much water left in the pot, place the pot back in the oven with no lid for an additional 15 minutes to evaporate the excess water.
-
To store the caramelized onions, store in an airtight container in the refrigerator for up to 2 weeks or they can be frozen for up to 3 months.
-
Optional Idea: Add a little Balsamic Vinegar during the last 15 minute cycle. The balsamic vinegar adds a little sweetness and balances it with some tartness.
-
Makes approximately 2 1/2 cups.
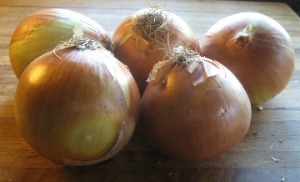
* You can use any large onion variety, but the yellow (brown-skin) onions are cheaper and actually work the best. Some onions caramelize more quickly than others, and the standard yellow onion (brown-skin) actually contains more sugars than "sweet" onions.
21 Responses to “Baked Caramelized Onions Recipe”
Keen-eyed cook
WTF?
You said “It is easy to caramelized onions, especially when you use my oven-baked method. This method cuts down on the cooking and stirring time required when you caramelize on your stove top.”
But your instructions say:
“Cook Time: 2 hours”
“Repeat this 15 minutes process for approximately 2 to 2 1/2 hours.”
So how the F does 2 – 2.5 hours cut down on the 30 minutes cooking time it usually takes?
Linda Stradley
You don’t have to stand at the stove and continually stir. The baking method cuts down on the cooking and stirring time required when you caramelize on your stove top.
Sheila
Thank you Linda! I love the oven method for roasting onions and much prefer it to standing over a pot on the stove stirring near constantly so they do not burn!
Emily
It’s certainly not the method for everyone, but this option works much better for some people like those with disabilities that impede their ability to sit or stand at a stove such as myself.
Linda Stradley
The baking method allows you to walk away to work on other things and just check and stir every 15 minutes. You just need the time and a little bit of patience for the cooking process.
Heather
To properly caramelize onions, it takes more than 30 minutes. It takes hours, no matter what method you use.
I will say that a better way to caramelize onions in the oven is to use low heat, like 225-250ºF, and lay the sliced onions out on a sheet pan after tossing them with olive oil and some salt. Stir every 15 minutes or so. I also place my sheet pan on a pizza stone. The low heat in the oven almost prevents any burned edges and tips of the onions, creating a very uniform caramelization. And by all means, do a large batch of these. They keep in the freezer (portioned, for future use) very well, so they’re always ready next time you want to use them but don’t have the time.
Snoop
THIS! Recipes that say 30 minutes, an hour, etc are lying. It takes like 3 hours.
Melodie
I work in a busy cafe, can see exactly how this cuts down time 😉 will be trying this @work, thank you for sharing – Darwin Australia
Stan
Love this recipe, worked a treat! Thank you!! Can’t wait to try the onion and goats cheese tarts!
In between stirrings I was able to make the ganache, ice the cake, shell a cup of pistachios and make the meringues for the pavlova! My end of Christmas dinner sorted!
Marla
I had a BUNCH of sliced onions left over from a large party, so I’m happy to try your technique tonight. I’ll be enjoying them for sure my thanks for sharing
Susie Bell
I appreciate this recipe. I have been preparing Thanksgiving dinner for 20-30 family members for 15 years. I don’t have time to stand and stir a pot. I have to make the cornbread, salt the turkey, fill a pie, and so forth. The oven is on anyway, and I can roast the sweet potatoes and other veggies while these brown. All of the veggies taste better if roasted, even sweet potatoes for a casserole. A bit of advice from my grandmother: If you don’t have something nice to say, don’t say anything at all. For those who don’t like this recipe, find one that suits you.
Cooper
Bravo Susie! Enough said!
Guin
This isn’t carmelizing. It is steaming. If you’re putting a lid on the pot, then you are creating watery steam which stays in the pot and makes the onions wet and mushy. For true carmelization, you need to cook the onions stove-top with NO LID so the moisture evaporates and reduces the volume of the onions into strings. Baking them this way just softens them.
Ben
Caramelization is a non-enzymatic browning of food sugars. The process is pyrolytic, meaning it involves the application of heat. If this method uses heat, which it does, and produces a caramel color, aroma and flavor, which it does, it is caramelizing.
ThomGR
Can I use some more aromatic herbs like rosemary or thyme, or even apple cider and balsamic vinegar, to give more depth to the taste? Which herbs are recommended.
Granny Andy
I have never been a fan of onions but during a Covid food give-a-way I received 12 pounds. Followed your recipe and am now hooked on these sugar sweet onions. Used my cast iron dutch oven and a large cast iron pan with tin foil lid. Cooked just over 2 hours at 400 degrees. Thank you so very much.
Caroline
I use your method to caramelize 25 pounds of onions at a time in my giant roaster. Cuts down on so much effort if I had to do them in the stove. Because of your technique I have been doing it this way for years now. Thanks so much!
James
Love the idea , Burnt 1st try , 2nd in oven seem to work , 4 lg yellow, yielded 1 1/2 – 2 cups. Now need suggested uses more than a stew additive .
Thanks from an old rookie cook .
Mary
After prepping all the onions (while seated), even stirring them every 15 minutes is not something my back will allow. Using a lower temperature and stirring less frequently might work for me even if the onions don’t develop a good color. Any comments that would make this process more efficient would be appreciated. I can’t stand to cook and stir anything on the stove top.
Heather
Yes, this method takes a long time, UNATTENDED. The prep time varies depending on your knife skills. But, yes, caramelizing onions tossed in oil and salt and stirring occasionally, is the best method to use. They don’t dry out or get scorched or burnt on the ends. Yes, they DO caramelize, even though covered. Initially, it is steaming and sweating. As the process continues, it becomes caramelizing.
I’ve seen myriad recipes and methods and “tricks” for caramelizing onions. The ONLY way to do it is low heat and time. Adding sugar or balsamic vinegar is a cheat and is not proper caramelization.
Stop complaining and learn proper skills.
Diane N
I suggest when making lesser quantities lowering the oven temp to 350-375 . For example I sliced 3 med onions I didn’t weigh them, but approximately 1 pound total, and following your directions, stirring every 15 minutes, they were on the brink of burnt at 45 minutes.
I intend to use them in a meatloaf recipe partially as and add in and also as a topping.