- 1/4 cup coffee syrup (reduced from 2 cups brewed coffee, preferably Kona coffee)
- 2 1/4 cups heavy cream
- 1/2 vanilla bean, split
- 1/2 cup granulated sugar plus 1 1/2 tablespoons
- 5 egg yolks, chilled
- 4 tablespoons granulated sugar (for topping)
-
In a saucepan over medium-high heat, reduce the brewed coffee to make the coffee syrup.
-
Preheat oven to 350 degrees F. Adjust oven rack to center position. Butter six (5-ounce) custard cups or ramekins and set them into a glass baking dish. Tip: Place a non-stick baking mat (called a silpat) or a tea towel on the bottom of your baking dish to both insulate and keep the ramekins firmly in place.
-
In a large saucepan over medium-high heat, add the cream and vanilla bean; heat until the cream just almost comes to a boil; remove from heat.
-
While the cream is heating, in a large bowl, whisk together the sugar and the egg yolks until blended. Slowly whisk the hot cream into the eggs to temper, until all the hot cream is incorporated. Remove and discard the vanilla bean.
-
Stir the prepared coffee syrup into the custard mixture, then strain to remove any lumps.
-
Divide the custard mixture among the prepared ramekins or custard cups in the baking dish. Bring the water for the water bath (see definition below) to a light simmer on top of the stove; carefully pour hot water into the baking pan to come half-way up the sides of the custard or ramekin cups. NOTE: The most common mistake people make in baking a custard is not putting enough water in the hot-water bath. The water should come up to the level of the custard inside the cups. You must protect your custard from the heat.
-
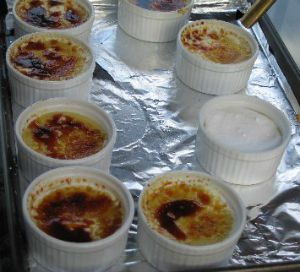
Carefully and gently place the baking dish in the oven. Loosely cover the top with a sheet of aluminum foil. Bake approximately 30 to 40 minutes (25 to 30 minutes for shallow fluted dishes) or until set around the edges but still loose in the center. The cooking time will depend largely on the size of the custard cup you are using and the altitude you are at. Begin checking at a half hour and check back regularly. When the center of the custard is just set, it will jiggle a little when shaken, that's when you can remove it from the oven. If using a digital instant-read thermometer, inserted in the centers, the internal temperature should register approximately 170 to 175 degrees F. Begin checking temperature about 5 minutes before recommended time.
-
High Altitude Cooking: Custards with a water bath will often need additional water during the baking time. Also your custards will need a longer cooking time because the altitude causes the water to evaporate faster.
-
Remove from oven and leave in the water bath until cooled to room temperature. Remove cups from water bath, cover with plastic wrap, and refrigerate at least 4 hours or up to 4 days.
-
Finishing the Creme Brulees: Finish the custards right before serving.
-
 When ready to serve, uncover ramekins or custard cups. If condensation has collected on the custards, place paper towel on surface to soak up moisture. Sprinkle approximately 1 to 2 teaspoons of sugar over each creme brulee (tilt and tap ramekins for even coverage). For best results, use a small hand-held torch. Hold the torch 4 to 5 inches from the sugar, maintaining a slow and even motion. Stop torching just before the desired degree of doneness is reached, as the sugar will continue to cook for a few seconds after flame has been removed.
 -
If you don't have a torch, place cre brulees 6 inches below the broiler for 4 to 6 minutes or until sugar bubbles and turns golden brown.
-
Refrigerate creme brulees at least 10 minutes before serving. Serve within 1 hour (30 to 45 minutes), as topping will deteriorate.
-
Makes 6 servings (depending on size of ramekins or custard cups).
-
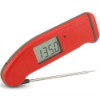 I get many readers asking what cooking/meat thermometer that I prefer and use in my cooking and baking. I, personally, use the Thermapen Thermometer. Originally designed for professional use, the Super-Fast Thermapen Thermometer is used by chefs all over the world. I only endorse a few products, on my web site, that I like and use regularly.
You can learn more or buy yours at: Super-Fast Thermapen Thermometer.
Sponsored Content
Sources: I slightly adapted this recipe from the Cafe O’Lei Restaurant in Kihei, Maui. Recipe appeared in an article by Noelle Carter in the Los Angeles Times newspaper, May 6, 2010. Photo by Kirk McKoy.
More Delicious Creme Brulee Recipes:
Creme Brulee – How To Make Perfect Creme Brulee
Very few desserts are more delicious to eat and to look at. This is one of my favorite desserts to serve at my dinner parties.
Ginger Creme Brulee
Very few desserts are more delicious to eat and to look at as creme brulee!
Chocolate Creme Brulee
This very elegant dessert is sure to cure your “chocolate craving.”
Lavender Creme Brulee
If you love lavender and love creme brulee, this dessert will instantly WOW you! I have served this wonderful creme brulee at many dinner parties.
Raspberry Creme Brulee
Fresh raspberries in a delicious creme brulee! What could be better?