Bread Machine and Stand-Up Mixer Instructions
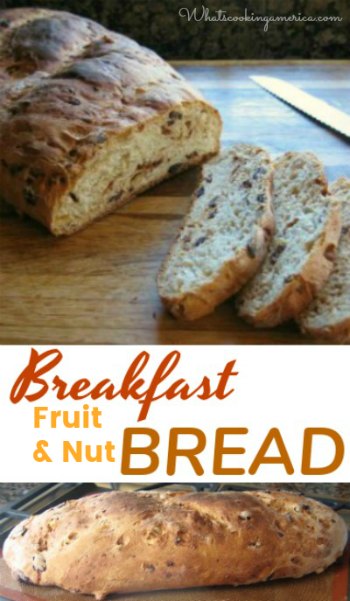
This wonderful Fruit and Nut Bread recipe is my take on Publix Breakfast Bread full of dried fruit and nuts. A satisfying sweet egg bread that makes a great morning toast spread with butter!
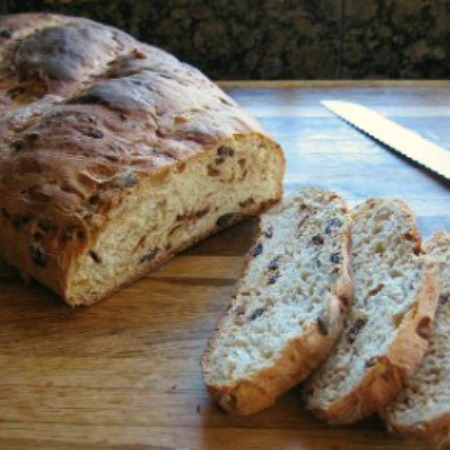
Gloria Bisson of Baca Raton, Florida asked if I would try to recreate a breakfast fruit and nut bread sold at her local Publix supermarket called “Breakfast Bread”. Since I have never tasted the Breakfast Bread she is referring too, I can only guess! I can tell you that my husband loves this bread with his morning coffee! It reminds us of Christmas Stollen bread. I have provided instructions for using a bread machine or stand-up mixer.
Check out Linda’s Bread Making Hints: Secrets to using the bread machine, About yeast in bread making, Sourdough Starter, and Quick Breads.
More great Bread Recipes, Sourdough Bread Recipes and Quick Bread Recipe for all your bread making.
- 1 1/4 cups warm water (110 degrees F.)
- 2 eggs, room temperature
- 1 tablespoon oil (olive oil, canola oil or vegetable oil)
- 1 tablespoon granulated sugar
- 1 teaspoon salt
- 1 teaspoon diastatic barley malt (optional)*
- 4 cups bread flour
- 1/2 cup whole wheat flour
- 3 teaspoons instant active dry yeast
- 2 to 2 1/2 cups of mixed chopped nuts and chopped dried fruit (such as raisins, dates, apricots, apples, cherries, etc.)**
-
Bread Machine Instructions:
-
Place all ingredients except nuts and dried/candied fruit in bread pan of your bread machine. Process according to manufacturer's instructions for a dough setting and press start. Do not be afraid to open the lid and check the dough. It should form a nice elastic ball. If you think the dough is too moist, add additional flour (a tablespoon at a time). The same is true if the dough is looking dry and gnarly. Add warm water (a tablespoon at a time).
-
If you can not judge your dough by looking, stick your finger in and feel the dough. It should be slightly tacky to the touch.
-
After approximately 15 minutes of the dough cycle, add nuts and dried fruit, and continue dough cycle. NOTE: If the addition of dried fruits causes your dough to get too sticky, don't worry. Add additional flour now or add it when you do the kneading process., remove the dough from the pan to a lightly floured surface. Knead the dough several times and form the dough into an oval; cover with plastic wrap and let rest for 10 to 15 minutes.
-
Stand Up Mixer Instructions:
-
In a large bowl or in the bowl of a 5-quart stand mixer, add all the ingredients. Using a dough hook, mix all the ingredients together into a uniform dough. It should form a nice elastic ball. If you think the dough is too moist, add additional flour (a tablespoon at a time). The same is true if the dough is looking dry and gnarly. Add warm water (a tablespoon at a time).
-
Turn the dough out onto a floured surface and knead until elastic, about 15 minutes. Cover the bowl with plastic wrap and let rest for 10 to 15 minutes.
-
After resting, turn dough bottom side up and press to flatten. Fold dough into an envelope by folding the top 1/3 of the way to the bottom. Then fold the bottom a 1/3 of the way over the top. Then press dough with the palm of your hand to make an indentation down the center of the dough and fold the top completely to the bottom, sealing the seam with the palm of your hand.
-
Place on a baking sheet dusted with cornmeal or covered with a silpad; cover and place in a warm spot to rise for approximately 20 minutes. Preheat oven to 400 degrees F.
-
Oven Rising: Sometimes I use my oven for the rising. Turn the oven on for a minute or so, then turn it off again. This will warm the oven and make it a great environment for rising bread. If you can nott comfortably press your hand against the inside of the oven door, the oven is too hot. Let it stand open to cool a bit.
-
Cool or Refrigerator Rise: If I don't have the time to wait for the rise to finish or I know that I will be interrupted before the completed rise, I do a cool rise. A cool rise is when the dough is place in the refrigerator and left to rise slowly over night approximately 8 to 12 hours. I usually do this after the first rise and the dough has been shaped into a loaf.
-
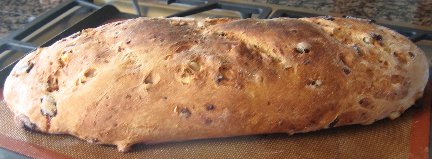
After dough has risen, slash the bread with a very sharp knife making three 1/2-inch deep diagonal slashes. Brush the top of the bread with cold water and bake for 20 to 25 minutes or until nicely browned. A good check is to use an instant digital thermometer to test your bread. The internal temperature should be between 200 and 210 degrees F.
-
Remove from oven and let cool on a wire rack.
-
Makes 1 1/2-pound loaf.
* Also called gluten flour, instant gluten flour, pure gluten flour, and vital wheat gluten depending on vendor and manufacturer. This is flour with the starch and bran removed. Gluten is the natural protein in the wheat endosperm which, when combined with water, forms a taffy-like dough. This retains the gas and steam from baking.
** To keep dried fruit and nuts from sticking together, put them in a small bowl with approximately 2 teaspoons flour; stir to thoroughly combine.
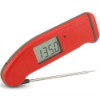
I get many readers asking what cooking/meat thermometer that I prefer and use in my cooking and baking. I, personally, use the Thermapen Thermometer. Originally designed for professional use, the Super-Fast Thermapen Thermometer is used by chefs all over the world. I only endorse a few products, on my web site, that I like and use regularly.
You can learn more or buy yours at: Super-Fast Thermapen Thermometer.
Sponsored Content
Comments from Readers:
9 Responses to “Breakfast Fruit and Nut Bread Recipe”
Rachel Greer
I’m new to baking, how should I mix the raw ingredients before setting the bread to rise?
Gail
Recipe starts with “After resting, turn dough bottom side up and press to flatten.” What do you have to do to get to that point, please.
Thanks
Whats Cooking America
Thanks for the catch! Looks like part of the instructions dissappeared during our site migration. This has been fixed.
Carolyn
This recipe looks very good. I’ve had the breakfast bread from Publix and LOVE it! Could you give directions for making this bread without a bread machine please? I’d live to make it but don’t have a machine.
Whats Cooking America
Thanks for asking! Instructions have also been added for using a stand-up mixer.
Judy
Love the fruit and nut breakfast bread don’t need anything to go with it.Whenever I’m in FLL Publix in Weston is my first stop. I just have to get that bread. Sometimes like previously mentioned they are sold out. My friends here in the Bahamas love it also.
Becki
Not sure what happened to my other question, but I have now tried the bread a second time, proofing longer (40 minutes) but still needs a tremendous amount more time in oven – additional 20-25 minutes. It’s just not happening. I thought this looked like it was similar to the Breakfast Bread at Central Market in Houston, Tx. I’m hoping to get to something close. I have put loose foil over it to stop from burning the top…. HELP.
Nancy
Becki, the best indicator that your bread is done is the internal temperature, which should be 200 degrees. There are many variables that can affect the cook time, your oven, your altitude, your loaf size etc. Tent foil over the top as you are doing to keep it from turning too brown and try rotating the loaves in your oven so they are cooking evenly. Happy Holidays!
Nancy
Becki
Try #3 in progress. I would love to see either a video or snap shots of the flattened dough and then each of the folds – my husband and I never agree as to how that is – trying a longer proof. I do use a thermometer to test for doneness which is a great help. Thanks for your reply.