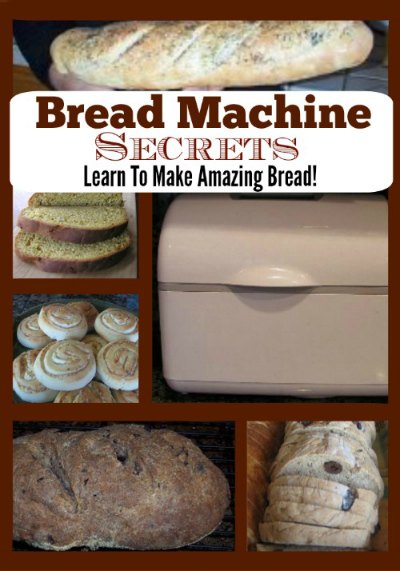
Learn To Make Amazing Bread
Learn the secrets to make amazing bakery-quality bread with your bread machine! Making homemade bread is so easier than you think, plus you will be so happy enjoying warm homemade bread. I do not bake my bread in the bread machine, I only make the dough in it. I then remove the dough from the bread machine, knead the dough again and form the loaf, and then let rise.
1. My bread machine has a regular dough cycle and a quick dough cycle.
I usually use the quick dough cycle. It also has a rise after mixing the dough. After the rise has completed, I remove the dough from the machine.
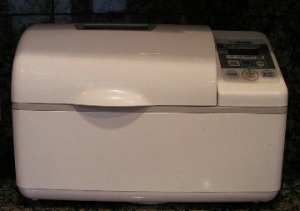 I use the Zojirushi Bread Machine shown in the photo. I only use the quick dough cycle in making my breads. When the dough is done, I remove it from the bread machine and prepare my bread dough as per the instructions below.
Follow the instructions for your bread machine regarding order of loading ingredients. The important thing is to keep the yeast away from the liquid and the salt until the bread-making begins; this is especially important when the machine will not start mixing the dough for several hours.
I follow the liquids-first-then-dry method, but instead of putting the sugar and salt on top of the flour, I add them to the liquid. I, personally, recommend placing ingredients in the pan in the following order:
Liquid (milk, water)
Eggs, oils, melted or softened butter
Salt, sugars (including honey, molasses)
Dried or powdered milk
Dried or fresh orange or lemon zest (peel)
Dried herbs, dried flavorings, seeds, and nuts
Whole wheat flour
Bread flour or all-purpose flour
Yeast
2. Adding Ingredients.
Water – I usually start out by adding fairly hot water (120 degrees F.) and find that by the time I have added all the other ingredients, the water has cooled to the proper temperature.
Butter – Melt or soften butter or margarine in the microwave before adding it to the machine.
Eggs – I bring my eggs to room temperature by placing them in a cup of really warm water for several minutes before adding.
Refrigerated Ingredients – Heat anything taken from the refrigerator (milk, buttermilk, cottage cheese, etc.) in the microwave until it is warm to the touch, about 1 minute.
Salt – Use only non-iodized salt (iodine attacks the yeast activity, slowing down the first fermentation). Salt is a yeast inhibitor and it is best to add it so it is not touching the yeast. If you are having trouble with short loaves, try cutting back on the salt (sometimes this solves the problem). I like to use coarse salt or sea salt in all my bread baking.
Other Ingredients – Orange, lemon, or grapefruit peel or zest, as well as cinnamon and alcohol, will have a retarding effect. Too much will stop the yeast activity completely. Cinnamon has a direct effect on the yeast activity and in large quantities it will stop fermentation completely. Keep high percentages of cinnamon out of the dough itself and add it in the fillings where it can have only a limited effect on the yeast activity.
Vital Gluten – Add 1 teaspoon of vital gluten per cup of whole grain flour in your recipes. This will produce a taller loaf. If you find the loaves are still short, increase by adding an extra teaspoon until you get the results you desire (be sure to note the amounts on the recipe).
Flour – For most breads, you should use bread flour. It has a higher protein content, which forms more gluten during kneading. If you use all-purpose flour, the bread does not rise as high, but it certainly rises. The bread is denser and not as fluffy.
Yeast – I use Instant Active Dry Yeast in all my breads. I use 1 teaspoon of instant yeast per cup of flour. If the recipe calls for over 3 cups of flour, I still use only 3 teaspoons. This gives me a taller and well-textured loaf. Sometimes, if the day is warm and humid, I cut back 1/2 teaspoon to prevent over proofing. The rapid dough cycle is the only cycle I use on my bread machine. Store your yeast in the refrigerator for a longer life.
3. The most important hint or tip.
Learn to read your dough. Do not be afraid to open the lid to check how your dough is doing. It should form a nice elastic ball. If you think the dough is too moist, add flour, a tablespoon at a time. The same is true if the dough is looking dry and gnarly. Add warm water, a tablespoon at a time. If you can not judge your dough by looking, stick your finger in and feel the dough. It should be slightly tacky to the touch.
4. Another secret is not to always flour the surface on which you form the dough (unless you have a very sticky dough).
Instead, lightly oil the work surface to prevent the dough from sticking. It is often the case that one uses too much flour on the work surface and, since dough that has risen will not accept any more flour, the excess flour used on the work surface just toughens the bread. I spray lightly in one spot and use my hands to spread it over the entire work surface. It is a sure bet that oiling your work surface will produce wonderful rolls and loaves of bread.
To oil the surface, you can either use oil or a nonstick cooking spray. If you wish, flavored oils may also be used, provided they are compatible with your bread. The nonstick cooking sprays should be used carefully, since it is easy to spray them unevenly.
5. I knead the dough just a little on the sprayed surface and form into a oval, cover with plastic wrap or a cotton towel, and let rest for 10 minutes.
This is an important step to let the dough rest after turning it out of the bread pan. This is called “benching” and it allows the dough to relax, making it easier to handle and shape.
The type and size of the plastic wrap or towel used to cover the dough is also important. Be sure it is large enough to cover your entire dough or you will have a “crust” form and the dough will no longer rise. Use a large cotton towel with a smooth surface. Do not use a terry towel (it will stick to the dough and flatten the loaf). An even worse consequence is that you might end up with a bread studded with bits of terry loops.
6. Handle dough gently.
Over molding could cause breaking of the surface tension and will result in a smaller finished loaf. After resting, turn dough bottom side up and press to flatten. Then fold dough into shape you want. Place on a cookie sheet or jelly roll pan dusted with cornmeal or the Silicone Baking Mats as nothing sticks to them and they are washable. Cover and place in a warm spot to rise, approximately 20 minutes. It is often difficult to determine when hand-shaped dough has risen enough, so test it by pushing on the dough with your finger (if it springs back up and hesitates, it has risen sufficiently).
Should you run out of time to bake your bread, allow the dough to go through the first rising, then shape the dough, and place into the refrigerator. The cold of the refrigerator will slow the yeast growth enough to give you 24 hours of breathing room. Before baking, allow the dough to come to room temperature (about one to two hours) before baking.
7. Preheat oven to 400 degrees F. (this is the temperature I use in a regular oven for most of my breads).
After rising, slash the bread with a very sharp knife, razor blade, or a lame (a lame is a sharp blade that gets under the dough as you cut, giving you just the right shape for expansion). Brush or spray the top of the bread with cold water (this keeps the dough wet so that it will not form a crust from the heat of the oven, thus allowing the bread to get a good “oven spring: during the first 5 minutes of baking) and bake for 20 to 25 minutes or until nicely browned. A good check is to use an instant meat thermometer to test your bread. The temperature should be between 200 and 210 degrees. I do this all the time.
 This is the type of cooking and meat thermometer that I prefer and use in my cooking. I get many readers asking what cooking/meat thermometer that I prefer and use in my cooking and baking. I, personally, use the shown in the photo on the right. To learn more about this excellent thermometer and to also purchase one (if you desire), just click on the underlined: Thermapen Thermometer.
8. Another secret to give your bread the professional bakery look is to use a cornstarch glaze.
I keep this mixture in my refrigerator to use on most of the breads I bake.
Cornstarch Glaze:
1/2 cup cold water
1 teaspoon cornstarch
In a small saucepan, with a small whisk, stir together water and cornstarch. Heat mixture to a gentle boil. Stir, reduce heat, until mixture thickens and is translucent. Let cool. Brush on loaf about 10 minutes before baking is finished and again 3 minutes before bread is completely done.
Check out all of Linda’s Bread Making Hints:
Quick Breads
Sourdough Starter – How to make a Sourdough Starter
Sourdough Bread Recipes
Yeast in bread making – Yeast Bread Tips
Comments from readers:
Thanks for the well organized tips on your web page. I have used my bread machine as you suggest; except I never thought of using the dough setting. I am going to use your schedule of adding ingredients on my next batch of dough.
I decided last October, just after I turned 80, that I would move up the plan for improving my bread making that w as on my bucket list. After 40 years of “just making bread” for myself I improved my bakery by adding the missing ingredient: Patience! I started off with a bread machine and moved on to the mixer and hand kneading.
Now, I don’t mind starting my bread in the morning and finishing it at 9 or 10 PM in the evening. It certainly has garnered me some friends that send invitations for dinner and suggest I bring some fresh baked bread instead of some other useless gift. Needless to say . . .
How I rise my loaves – I put the tiles on the racks and turn on the oven light when I start gathering my ingredients. I leave the lights on until ready to put the dough in the oven to start the rise. I check the temperature in the oven looking for 72 to 76 F. degrees. – John Farrell – I live on a little farm next to the North Fork of the Crow River in Marysville Township, Wright County, MN.
Categories:
Cooking Hints & Tips
34 Responses to “Bread Machine Secrets”
phoebe zavala
This is new for me,so hope to make wonderful bread
Whats Cooking America
Best of luck on your first bread endeavor. We would love to hear your results or see pictures. 🙂
Sandy Deustachio
Thank you for the complete easy to follow instructions on using the bread machine to start bread. I have read a lot of instructions, but these are by far the easiest to follow.
Mahi
I only use the quick dough cycle in making my breads. When the dough is done, I remove it from the bread machine and prepare my bread dough .
heron
thank you fro the article.
Timma Wilson
I have a Zojirushi virtuoso. It rises dough 3 times. Not sure if all 3 are used for dough cycle. I haven’t used it before. Should I leave dough In the machine through all 3 rises, or do I pull it out early since I will be doing a final rise after shaping dough?
Billy
It will not rise 3 times on the dough cycle.
Izziem
My zojirushi bread machine will rise dough three times. It does not have a quick dough option and I only use it for making dough. I had used it once when it was new and baked bread but I didn’t like the outcome. Operator error I suppose.
Sabina
I’m absolutely impressed and very thankful that you have made this information available. It was very helpful, well written and organized. Thank you.
Ron
Such an informative and well-written article. Thanks for all the hints.
Diane Smith
Excited to try some of your tricks. Getting ready to try sprouted flour. Any good hints using this? I’ve made several white loafs and cinnamon roll dough.
Nancy
When I was working with sprouted flour, I ended up having to mix it with regular flour to get a good consistency.
Sherry
I love your instructions, but can’t I just leave it in the machine to bake? I’ve made bread “by hand” for a while now. I thought this was a simple alternative. Any response is appreciated. Thank you!
Nancy
Feel free to leave it in the machine. I just use the bread machine as a work horse. I like to take it out and shape it or bake it in a loaf pan.
Elaine
The paddle attachment in my bread machine keeps getting stuck in the bread when I remove the loaf from the pan. How do I fix this?
Earle
Elaine, IDK if you have the Zojirushi or not. It has two paddles. With it, you can turn the pan upside down and twist the toothed wheels which fit into the gears in the bottom of the machine, which will free up the paddles. This may be a little more difficult in a machine with only one paddle…
Cindy
I want to make a raisin bread in the machine then bake in the oven. If I use the dough setting, will I still be able to add the raisins to the machine or have to add them to the dough before baking?
Whats Cooking America
After approximately 15 minutes of the dough cycle, you can add nuts and dried fruit, and continue dough cycle. NOTE: If the addition of dried fruits causes your dough to get too sticky, don’t worry. Add additional flour now or add it when you do the kneading process.,
Diane Elgie
Thank you for the wonderful tips on how to use the dough cycle on a bread maker. I’m a newbie in the bread making department but so far have only baked bread in the machine. I will use it for preparing the dough then transfer it to the conventional oven. Less mess and washing up! Can you prepare any type of dough in the machine? Diane.
Joan Sarge
Can you make gluten free breads in a bread machine?
Katrina
Can you clarify the type of yeast used please. The Yeast notes above refer to Instant Active Dry Yeast, however your article on Yeast advises that there are two types of yeast, Active Dry Yeast and Instant Yeast. Is Instant Active Dry Yeast a combination of both?
Whats Cooking America
Active dry yeast needs to be dissolved in water before using, while instant yeast can be mixed right into dry ingredients. So Instant Active Dry Yeast can be mixed into dry ingredients without dissolving.
Shirley
Thank you for the good information 😊
Nancy
You’re welcome, thank you for visiting.
Dana
Thanks for the awesome tips!! I just purchased the zojirushi bread machine bbhac10 model. Can’t wait to try your method! 🙂
Alice J Shepherd
I live at 4000 ft. and have trouble with yeast. How do I make adjustments in the yeast for this altitude?
Reuel Amdur
The supermarket no longer has bread flour. We bought gluten flour at the health food store. How much do we add to make one loaf?
Carolyn
Any suggestions for making French Bread?
Nancy
Here is our French bread recipe:https://whatscookingamerica.net/Bread/FrenchBread.htm
Marcy Harlan
I’ve been using a bread machine since the day of the domed ones. I now have an Oster. I started using the dough only cycle almost 20 years ago. You can do so much with the bread dough! I once formed it into animal ” cookies” for my boys to take to kindergarten as a treat. The other kids loved it! I often roll or pat the dough out and lay pepperoni and cheese on it, then roll it up and bake it. Warning! If you do that, make several small loaves! Lol… My kids would sneak an entire loaf! I also make buns a lot. And I use the bread machine to make the dough for homemade noodles and knoephle 🙂
Denise Jordan
I made blueberry bread where it said to add wet ingredients to bread pot first. Let mix then add dry. Well I followed instructions but the wet ingredients splashed all over the inside of the machine. Why? And how do I prevent this from happening again. What a mess.
Nancy
An option you could try, add all the wet ingredients and mix it in a bowl before pouring into the bread machine.
Let me know how it goes next time
Nancy
teresa j hicks
can you use self rising flour?+
GM
When spraying the sides of the bread pan with Pam (or another brand) I wait until after the 2nd kneading cycle. This way the spray does not mix with the dough & stays on the side of the pan.