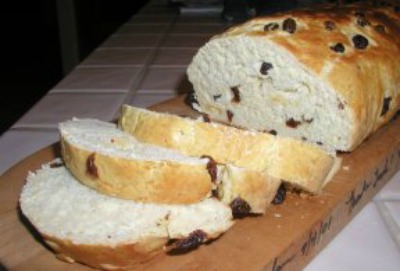
Portuguese Potato Bread is an amazing, slightly sweet, awesome bread.
This Portuguese Potato Bread is very festive looking. I love serving this bread for the Christmas and Easter holidays. Potato bread tastes wonderful with your turkey sandwiches, and in the rare event any is left over, it makes a great French toast.
Check out Linda’s Bread Making Hints: Secrets to using the bread machine, About yeast in bread making, Sourdough Starter, and Quick Breads.
More great Bread Recipes, Sourdough Bread Recipes, and Quick Bread Recipes for all your bread making.
- 1/2 cup potatoes, uncooked, peeled and diced (approximately 1/2 medium potato)
- 1 cup boiling water
- 2 eggs
- 3 tablespoons butter, room temperature
- 1 teaspoon lemon zest (peel), grated
- 3/4 cup granulated sugar
- 1 teaspoon salt
- 4 1/3 cups bread flour
- 3 teaspoons instant active dry yeast
- 3/4 to 1 cup raisins
- 1 egg, beaten (for glaze)
-
In a small saucepan over low heat, cook diced potato in the boiling water approximately 10 to 15 minutes or until tender when pierced with a fork. Remove from heat and drain, reserving potato liquid. Add enough water to the potato liquid, if necessary, to equal 3/4 cup of liquid; set aside Mash the potato with fork.
-
Place mashed potato, 3/4 cup potato liquid, eggs, butter, lemon peel, sugar, salt, bread flour and yeast in bread pan of your bread machine. Select dough setting and press start. Do not be afraid to open the lid and check the dough. It should form a nice elastic ball. Halfway through dough cycle, add raisins. If you think the dough is too moist, add additional flour (a tablespoon at a time). The same is true if the dough is looking dry and gnarly. Add warm water (a tablespoon at a time).
-
When dough cycle has finished, remove dough from pan and turn out onto a lightly oiled surface. (I use a nonstick cooking spray). Add the raisins and knead into the dough. Form dough into an oval, cover with a plastic wrap and let rest for 10 minutes.
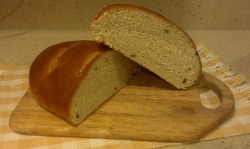
Shape dough either into a large baguette loaf or two small round and place on large baking sheet dusted with cornmeal (I use the silpads instead of cornmeal). Cover with plastic wrap and place in a warm spot to rise, approximately 20 minutes. -
Oven Rising: Sometimes I use my oven for the rising. Turn the oven on for a minute or so, then turn it off again. This will warm the oven and make it a great environment for rising bread. If you can't comfortably press your hand against the inside of the oven door, the oven is too hot. Let it stand open to cool a bit. -
Cool or Refrigerator Rise: If I don't have the time to wait for the rise to finish or I know that I will be interrupted before the completed rise, I do a cool rise. A cool rise is when the dough is place in the refrigerator and left to rise slowly over night approximately 8 to 12 hours. I usually do this after the first rise and the dough has been shaped into a loaf.
-
Preheat oven to 350 F.
-
After rising, slash the bread with a bread razor or a very sharp knife making three 1/2-inch deep diagonal slashes on loaf shape or a cross on rounds. Brush top of loaves with beaten egg and bake for 30 to 35 minutes. After 15 minutes, cover loaves with aluminum foil to prevent over browning. A good check is to use an instant digital thermometer to test your bread. The internal temperature should be between 200 and 210 degrees.
-
Remove from oven and place the bread on a wire rack to cool. Let baked loaf cool for 30 minutes before cutting (this is because the bread is still cooking while it is cooling).
-
TIPS: Dried cranberries and apricots can be either substituted for the raisins for added along with the raisins for a colorful and tasty bread.
-
Makes 1 large baguette loaf or 2 small round loaves.
-

 I have your Portuguese Potato Bread rising in the bread machine right now. We are of Portuguese heritage and my Mom made sweet bread every Easter when the fresh chicken eggs were plentiful. She always said the yolks were more yellow because the chickens ate grass. We did not raise chicken, but bought the cracked eggs from chicken ranch. It brings back a lot of memories. Unfortunately Mom did not have a bread machine and we mixed 10 pounds of flour and dozens of eggs at a time in a huge roaster (not sure about those measurements, but it sure seemed like a lot when I was a kid).