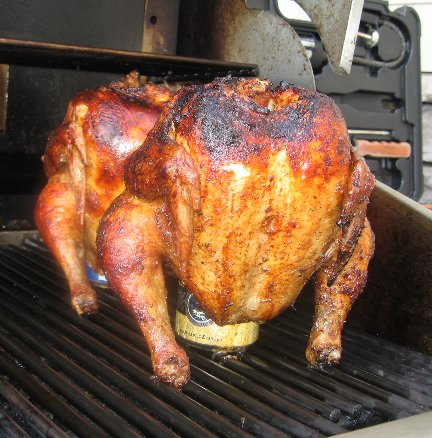
Beer Butt Chicken, Drunken Chicken, or Beer Can Chicken – no matter what you call this chicken cooked on a beer can, this is a delicious way to barbecue a whole chicken. This chicken is the juiciest cooked chicken you will ever try! The beer inside the can steams the chicken from the inside making it so tender and juicy with a crisp and delicious outside.
Prepare this chicken recipe when you are having a group of people over. Everyone likes to watch the preparation and the cooking of this chicken as it looks so weird on the barbecue grill. Great entertainment plus being so delicious!
This fabulous chicken was prepared for our family by family friend, Brian Walker of Hillsboro, Oregon. He prepared this outstanding chicken for one of our get-togethers.
- 1 (3 1/2 to 4 pounds) whole chicken
- 1 (12-ounce or 16-ounce) can beer (cut off top with can opener)*
- 1 cup olive oil or butter
- 2 tablespoons garlic salt or 4 to 5 cloves garlic, crushed
- 2 tablespoons paprika
- Pinch cayenne pepper or to taste
- Herbs of your choice, fresh or dried
- Coarse salt and freshly-ground black pepper to taste
-
Preheat barbecue grill (spray grill with vegetable-oil cooking spray). Drink (or pour out) 1/4 of the beer from the can.
-
In a small saucepan over low heat, melt butter or heat olive oil. Mix in garlic salt, paprika, cayenne pepper, herbs, salt, and pepper; set aside. NOTE: You can substitute any favorite chicken rub.
-
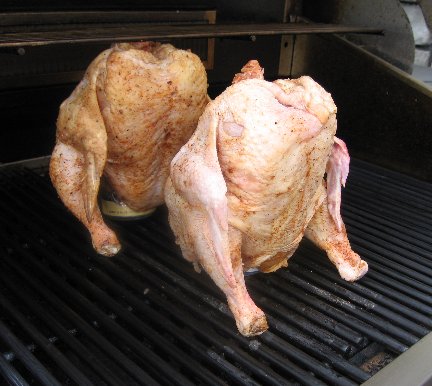
Cut off all the fat from the body and neck openings as you want the cavity free and clear; remove the giblets and discard. Rub the inside and outside of the chicken with butter/seasoning mixture (this seals the chicken and also ensures that the skin will be brown and crispy when done).
-
Slide the top of the beer can deep inside the chicken cavity (the bottom end). Lightly oil the exterior of the can with salad oil. If the opening is especially wide, a carrot or slice of potato can be slid in beside the can to seal off the cavity. Push until the can is almost fully inside the bird. The bottom of the can and the two legs bent slightly downward form a tripod which keeps the chicken upright on the grill.
-

-
-
Cover barbecue with lid, open any vents, and cook over low to medium heat for approximately 2 to 3 hours (depending on your heat source) or until a meat thermometer registers an internal temperature of 165 degrees F. (juices will run clear when cut with the tip of a knife). Check the chicken every 20 minutes or so and brush on more of the butter/seasoning mixture or olive oil as needed. If the chicken is browning too fast, cover the chicken with aluminum foil.
-
When the chicken is done, remove from the grill and let the chicken cool for 15 minutes before cutting and serving (meat temperature will rise 5 to 10 degrees after it is removed from the oven). NOTE: When removing the chicken from the grill, be especially careful as the aluminum can (and the liquid in it) will be very hot and you could burn yourself.
-
One chicken makes approximately 4 generous servings.

* Fruit juice, soda (not diet) or wine can be used in place of beer, but beer is the tastiest option (the beer vaporizes and soaks into the meat making it very moist and very tasty).
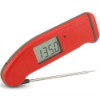 I get many readers asking what cooking/meat thermometer that I prefer and use in my cooking and baking. I, personally, use the Thermapen Thermometer. Originally designed for professional use, the Super-Fast Thermapen Thermometer is used by chefs all over the world. I only endorse a few products, on my web site, that I like and use regularly.
You can learn more or buy yours at: Super-Fast Thermapen Thermometer.
Sponsored Content
4 Responses to “Beer Butt Chicken Recipe”
Kathleen Burns
This is a must do recipe when it stops snowing in WNY. Thanks for sharing.
Also, I use same thermometer for yrs now. Totally love it. Prior to finding this one, I was purchasing a new thermometer every yr or so.
Thanks again for tecipe. Yum!
Rachel
A major thing you probably would want to add to the instructions is to not put over direct heat or only light one side of the grill and have the chicken cook on the opposite side. If the chicken is over direct flame it lights the chicken on fire and burns it even on low heat, ultimately ruining your chicken. Thanks 😑
Al Berghela
I believe you forgot to add a piece of orange or lime in the neck to hold in the steam from the beer can.
Briana Schwab
I am wondering if this could be completed on a smoker and if so, what the temperature should be set at?
Thanks