Check out Linda’s Bread Making Hints: Secrets to using the bread machine, About yeast in bread making, Sourdough Starter, and Quick Breads. More great Bread Recipes, Sourdough Bread Recipes, and Quick Bread Recipes for all your bread making.
- 1 cup warm water (110 degrees F.)
- 1 tablespoon olive oil
- 1/2 teaspoons salt
- 1 teaspoons granulated sugar
- 1 teaspoon rosemary, fresh and finely chopped
- 1/2 teaspoon basil, dried and crushed
- 1/2 teaspoon thyme, dried and crushed
- 1/2 teaspoon plus 1 tablespoon oregano, dried and crushed
- 2 1/4 cups bread flour
- 3 teaspoons instant yeast
- 1/2 cup cold water
- 1 teaspoon cornstarch
- 3 tablespoons parmesan cheese, finely grated
- 1 to 2 teaspoons rosemary, fresh and finely chopped
-
Bread Machine Instructions:
-
Place all ingredients except the topping mixture in bread pan of your bread machine. Process according to manufacturer's instructions for a dough setting. Do not be afraid to open the lid and check the dough. It should form a nice elastic ball. If you think the dough is too moist, add additional flour (a tablespoon at a time). The same is true if the dough is looking dry and gnarly. Add warm water (a tablespoon at a time).
-
If you can not judge your dough by looking, stick your finger in and feel the dough. It should be slightly tacky to the touch. When the bread machine has completed the dough cycle, remove the dough from the pan to a lightly floured surface. Knead the dough several times and form the dough into an oval; cover with plastic wrap and let rest for 10 to 15 minutes.
-
Stand Up Mixer Instructions:
-
In a large bowl or in the bowl of a 5-quart stand mixer, add all the ingredients. Using a dough hook, mix all the ingredients together into a uniform dough. It should form a nice elastic ball. If you think the dough is too moist, add additional flour (a tablespoon at a time). The same is true if the dough is looking dry and gnarly. Add warm water (a tablespoon at a time).
-
Turn the dough out onto a floured surface and knead until elastic, about 15 minutes. Cover the bowl with plastic wrap and let rest for 10 to 15 minutes.
-
After resting, turn dough bottom side up and press to flatten. Fold dough into an envelope by folding the top 1/3 of the way to the bottom. Then fold the bottom a 1/3 of the way over the top. Then press dough with the palm of your hand to make an indentation down the center of the dough and fold the top completely to the bottom, sealing the seam with the palm of your hand.
-
Place on a baking sheet dusted with cornmeal or covered with a silpad; cover and place in a warm spot to rise for approximately 20 minutes. Preheat oven to 400 degrees F.
-
Oven Rising: Sometimes I use my oven for the rising. Turn the oven on for a minute or so, then turn it off again. This will warm the oven and make it a great environment for rising bread. If you can nott comfortably press your hand against the inside of the oven door, the oven is too hot. Let it stand open to cool a bit.
-
Cool or Refrigerator Rise: If I don't have the time to wait for the rise to finish or I know that I will be interrupted before the completed rise, I do a cool rise. A cool rise is when the dough is place in the refrigerator and left to rise slowly over night approximately 8 to 12 hours. I usually do this after the first rise and the dough has been shaped into a loaf.
-
After dough has risen, slash the bread with a very sharp knife making three 1/2-inch deep diagonal slashes. Brush or spray the top of the bread with cold water and bake for 10 minutes. With a pastry brush, brush the prepared Cornstarch Glaze (see below) over top of the bread; sprinkle the topping mixture (combination of parmesan cheese and rosemary) over the top. Return to oven and bake an additional 10 minutes or until nicely browned. A good check is to use an instant digital thermometer to test your bread. The internal temperature should be between 200 and 210 degrees F.
-
Remove from oven and let cool on a wire rack.
-
Makes 1 1/2-pound loaf.
-
This is a typical mixture that professional bakers use to get that characteristic sheen on breads. I keep this mixture in my refrigerator to use on all the breads I bake.
-
In a small saucepan, with a small whisk, stir together water and cornstarch. Heat mixture to a gentle boil. Stir, reduce heat, until mixture thickens and is translucent. Cool. Brush on loaf about 10 minutes before baking is finished.
-
In a small bowl, combine the parmesan cheese and rosemary; set aside until ready to use.
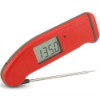 I get many readers asking what cooking/meat thermometer that I prefer and use in my cooking and baking. I, personally, use the Thermapen Thermometer. Originally designed for professional use, the Super-Fast Thermapen Thermometer is used by chefs all over the world. I only endorse a few products, on my web site, that I like and use regularly.
You can learn more or buy yours at: Super-Fast Thermapen Thermometer.