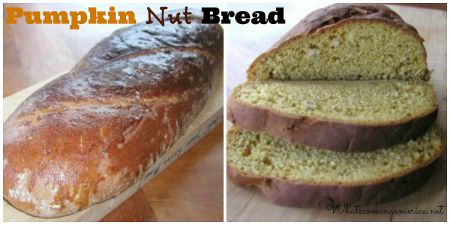
Pumpkin Nut Yeast Bread makes fantastic turkey sandwiches! Because I love turkey sandwiches after my Thanksgiving Turkey Day dinner, I served this delicious Pumpkin Nut Yeast Bread for Thanksgiving Dinner. Everyone loved it – both children and adults. So simple to make with all the flavors of pumpkin pie baked into this delicious yeast bread.
This Pumpkin Nut Yeast Bread is light and fluffy – perfect for toast or sandwiches, especially turkey sandwiches spread with leftover cranberries. The perfect way to dress up your leftovers. Also try this bread for breakfast toasted with some apple butter.
To save time, let your bread machine do the job of mixing. Check out these easy Secrets to using the bread machine.
Check out Linda’s Bread Making Hints: About yeast in bread making, Sourdough Starter, Quick Breads.
Check out all of Linda’s great Bread Recipes for your bread making.
- 3/4 cup canned pumpkin puree*
- 6 tablespoons lukewarm milk (70 degrees F.)
- 1 large egg, lightly beaten
- 3 tablespoons olive oil
- 2 teaspoons pumpkin pie spice
- 1 teaspoon salt
- 1/4 cup (firmly-packed) brown sugar
- 3/4 to 1 cup nuts, coarsely chopped and toasted (see Toasting Nuts below)
- 3 cups bread flour
- 3 teaspoons Instant Active Dry Yeast
- Cornmeal (optional for dusting pan)
-
Place all ingredients in the pan of the bread machine in the order suggested by the manufacturer. Select dough setting and press start. If you think the dough is too moist, add additional flour (a tablespoon at a time). The same is true if the dough is looking dry and gnarly. Add warm water (a tablespoon at a time).
-
When dough cycle has finished, remove dough from pan and turn out onto a lightly oiled surface (I use a nonstick cooking spray). Form dough into an oval, cover with plastic wrap and let rest for 10 minutes.
-
Shape dough either into a large baguette loaf or two small round and place on large baking sheet dusted with cornmeal (I use the silpads instead of cornmeal). Cover with plastic wrap and place in a warm spot to rise, approximately 20 to 30 minutes.
-
Oven Rising: Sometimes I use my oven for the rising. Turn the oven on for a minute or so, then turn it off again. This will warm the oven and make it a great environment for rising bread. If you can't comfortably press your hand against the inside of the oven door, the oven is too hot. Let it stand open to cool a bit.
-
Cool or Refrigerator Rise: If I don't have the time to wait for the rise to finish or I know that I will be interrupted before the completed rise, I do a cool rise. A cool rise is when the dough is place in the refrigerator and left to rise slowly over night approximately 8 to 12 hours. I usually do this after the first rise and the dough has been shaped into a loaf.
-
Preheat oven to 375 F.
-
After rising, slash the bread with a bread razor or a very sharp knife making three 1/2-inch deep diagonal slashes on loaf shape or a cross on rounds. Bake for 25 to 30 minutes. After 15 minutes, cover loaves with aluminum foil to prevent over browning. A good check is to use an instant digital thermometer to test your bread. The temperature should be between 200 and 210 degrees F.
-
Remove from oven and place the bread on a wire rack to cool. Let baked loaf cool for 30 minutes before cutting (this is because the bread is still cooking while it is cooling).
-
Makes 1 large baguette loaf or 2 small round loaves
-
-
Preheat oven to 350 degrees F. Place nuts in a shallow baking pan and bake for 15 to 20 minutes or until nuts are lightly browned, stirring occasionally.
-
Remove from oven and let cool.
-
* The same pumpkin puree as you would use for making pumpkin pies.
 I get many readers asking what cooking/meat thermometer that I prefer and use in my cooking and baking. I, personally, use the Thermapen Thermometer. Originally designed for professional use, the Super-Fast Thermapen Thermometer is used by chefs all over the world. I only endorse a few products, on my web site, that I like and use regularly.
You can learn more or buy yours at: Super-Fast Thermapen Thermometer.