When we think Banana Bread, quick bread comes to mind first. Try this outstanding Almond Banana bread; it is a Yeast Bread version of banana bread. The banana makes this recipe delicious and moist sweet bread.
You are probably thinking that there is not time to make yeast bread and that it sounds like a lot of work. Not true! U se the provided bread machine instructions and let the it to do the dirty work for you. The bread machine does all the mixing and kneading. Just use the dough setting on the bread machine. After the final rise, take it out, shape it, or place it in a bread pan. Bake in the oven for professional looking baked bread.
This recipe is a great use for any overripe bananas that you may have – do not throw them away. When you have lemons you make lemonade, when you have bananas, make banana bread! Everyone will love you for it. This Banana bread is a great treat for breakfast as it makes delicious toast.
Another great idea is to try it for lunch, replace this bread when making a peanut butter and jelly sandwich.

Check out Linda’s Bread Making Hints: Secrets to using the bread machine, About yeast in bread making, Sourdough Starter, and Quick Breads.
More great Bread Recipes, Sourdough Bread Recipes and Quick Bread Recipe for all your bread making.
- 2/3 cup warm water (110 degrees F.)
- 2 tablespoons vegetable oil or olive oil
- 3 tablespoons granulated sugar
- 1 1/4 teaspoons salt
- 1 egg, slightly beaten
- 2 medium-sized bananas, ripe and mashed with a fork*
- 1/2 cup almonds, sliced or chopped
- Zest of 1 lemon, grated
- 3 1/2 to 4 cups bread flour
- 3 teaspoons instant active dry yeast
-
Place all ingredients in the pan of the bread machine in the order suggested by the manufacturer. Select dough setting and press start. NOTE: Check the dough (don't be afraid to open the lid). It should form a nice elastic ball. If you think the dough is too moist, add additional flour (a tablespoon at a time). The same is true if the dough is looking dry and gnarly. Add warm water (a tablespoon at a time).
-
When dough cycle has finished, remove dough from pan and turn out onto a lightly floured surface. Form dough into an oval, cover with plastic wrap, and let rest for 10 minutes.
-
After resting, turn dough bottom side up and press to flatten. Fold dough into an envelope by folding the top 1/3 of the way to the bottom. Then fold the bottom a 1/3 of the way over the top. Then press dough with the palm of your hand to make an indentation down the center of the dough and fold the top completely to the bottom, sealing the seam with the palm of your hand.
-
Place on a jelly roll pan dusted with cornmeal; cover with plastic wrap and place in a warm spot to rise for approximately 30 minutes or until doubled.
-
Oven Rising: Sometimes I use my oven for the rising. Turn the oven on for a minute or so, then turn it off again. This will warm the oven and make it a great environment for rising bread. If you can't comfortably press your hand against the inside of the oven door, the oven is too hot. Let it stand open to cool a bit.
-
Cool or Refrigerator Rise: If I don't have the time to wait for the rise to finish or I know that I will be interrupted before the completed rise, I do a cool rise. A cool rise is when the dough is place in the refrigerator and left to rise slowly over night approximately 8 to 12 hours. I usually do this after the first rise and the dough has been shaped into a loaf.
-
Preheat oven to 350 degrees F.
-
Bake for 35 to 40 minutes or until loaf sounds hollow when tapped. A good check is to use an instant digital thermometer to test your bread. The internal temperature should be between 200 and 210 degrees F.
-
Remove from oven and cool on a bread rack for about 10 minutes. Remove from pan.
-
Makes 1 1/2-pound loaf.
-
* I usually add as many ripe bananas I have that I need to use before spoiling, adjusting the flour in the recipe as needed.
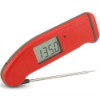 I get many readers asking what cooking/meat thermometer that I prefer and use in my cooking and baking. I, personally, use the Thermapen Thermometer. Originally designed for professional use, the Super-Fast Thermapen Thermometer is used by chefs all over the world. I only endorse a few products, on my web site, that I like and use regularly.
You can learn more or buy yours at: Super-Fast Thermapen Thermometer.
Sponsored Content
Making Muffins from a Quick Bread Recipe
Same recipe – same baking time – different shape
Choose a recipe that makes about 4 cups of batter. Most quick bread recipe make approximately 4 cups of batter which will make approximately 12 muffins.
If your quick bread recipe makes two loaves, the entire recipe should yield about 8 cups of batter, from which you can make either two dozen muffins, or one loaf and 12 muffins.
A typical muffin uses about 1/4 cup of batter. Fill each well in your muffin pan about 3/4 to nearly full. Tip: A #16 ice cream scoop will give the perfect amount of dough for each muffin.
Oven temperature and time can be flexible.
Bake the muffins for approximately 20 to 25 minutes in a 400 degree F. oven or approximatelyt 25 to 30 minutes at 375 degree F. Rotate muffin tin from front to back halfway through the baking time.
A good check for doneness is to use an instant digital thermometer to test your muffins (this is what I do). The internal temperature of the muffin should be at 200 degrees F.
Remove from oven and as soon as they have cooled enough to handle, remove the muffins from pan and place on a wire rack to finish cooling (if desired).