Sourdough Rustic Bread is a slightly denser sourdough bread than the usual sourdough recipe, but is still light and airy with a rich deep flavor. This is the perfect sourdough bread recipe to use your sourdough starter. A great recipe to see how wonderful artisan homemade bread is. Remember to feed your sourdough starter the night before you want to use it.
Bread Making Hints: Secrets to using the bread machine, About yeast in bread making, and Sourdough Starter – How to make a Sourdough Starter. More great Bread Recipes, Sourdough Bread Recipes, and Quick Bread Recipe for all your bread making.
- 1 1/3 cups lukewarm water (70 degrees F.), divided
- 1 cup sourdough starter, room temperature*
- 1 teaspoon instant yeast
- 1/2 teaspoon diastolic malt (optional)**
- 3 2/3 cups bread flour***
- 1/2 teaspoon coarse salt or sea salt
- 1 1/2 tablespoons milk, cold
- 1 1/2 tablespoons olive oil, extra-virgin
- Semolina flour (for dusting)
-
Place 1 cup water, sourdough starter, yeast, diastatic malt, and flour in the bowl of a mixer; stir with a rubber spatula or wooden spoon, just to moisten. Fit the mixer with a dough hook and mix the dough on medium speed for 6 minutes. Turn the mixer off and allow the dough to rest for 20 minutes.
-
Add salt and mix on medium speed for 2 more minutes, scraping down the sides of the bowl with a rubber spatula as necessary.
-
Place milk, olive oil and remaining 1/3 cup water in a small bowl; stir together. With the mixer on low speed, very gradually add the liquids to the dough. Do not add the liquids too rapidly or they will slosh out of the bowl. Continue mixing on low until the ingredients are completely incorporated and then beat on high speed for 4 minutes.
-
Cover the bowl with plastic wrap and allow the dough to ferment at room temperature for 2 to 2 1/2 hours, or until it doubles in volume. Sprinkle the work surface heavily with flour and pour the dough out to form a rough oval. Sprinkle the top of the dough with flour, cover with plastic wrap and allow it to rest for 20 minutes.
-
Cut a piece of parchment paper approximately 12 x 16-inches. Sprinkle the paper heavily with the semolina flour, then with bread flour. Uncover the dough and sprinkle the top with more bread flour.
-
Carefully scoop up the dough, using the dough cutter and your free hand to hold each end, and lay the dough on the parchment paper, allowing the dough to stretch as it falls to form an oblong shape approximately 8 x 10 inches in area and 1 1/2 inches thick. NOTE: Its more important to get the proper thickness than the right width or length.
-
Using your index fingers, dimple each piece of dough at random 2-inch intervals, being sure to press through all the way through to the parchment paper. Lightly sprinkle the dough top with bread flour and semolina flour. Cover with plastic wrap and allow to proof at room temperature for 2 hours. Test for readiness by lightly pressing two fingers into the dough. The dough should feel soft and alive, not longer sticky.
-
Set the baking stone on the lowest oven rack and preheat oven to 500 degrees F. about 20 minutes before baking the bread. Before adding the bread, open the oven door and heavily spritz the oven with water from a spray bottle and quickly close the door. Keeping the parchment paper under the dough, slide the bakers peel (a large baking spatula) under the dough.
-
Open the oven door, slide the dough and the parchment paper onto the baking stone and quickly close the door. Spritz with water again. Reduce temperature to 450 degrees F. Spritz the oven with water two more times during the next 5 minutes. Refrain from opening the oven door for 15 minutes.
-
After 15 minutes, slide the peel between the bread and the parchment paper and remove the paper. Return the bread to the baking stone and rotate if necessary to ensure even baking. Continue baking another 5 minutes. With the peel, flip the bread upside down to allow even browning. Bake another 5 to 8 minutes for a total of 30 to 33 minutes or until the bread is nicely browned and sounds hollow. A good check is to use an instant digital thermometer to test your bread. The internal temperature should be between 200 and 210 degrees F.
-
Remove the loaf from the oven and place on a cooling rack. When the bread is cooled, dust off excess flour.
-
Makes 1 large round loaf.
-
* If you don’t presently have a sourdough starter, either make your own sourdough starter or purchase Packaged Sourdough Starter Mix by mail-order.
** Diastatic malt contains active enzymes which help break starch down into sugar. The extra sugar feeds the yeast in the dough, helping the bread to rise, and also gives the bread a browner crust.
*** The thickness of your sourdough starter can determine how much flour needs to be used. If you think the dough is too moist, add additional flour (a tablespoon at a time). The same is true if the dough is looking dry and gnarly. Add warm water (a tablespoon at a time).
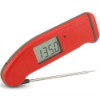
I get many readers asking what cooking/meat thermometer that I prefer and use in my cooking and baking. I, personally, use the Thermapen Thermometer. Originally designed for professional use, the Super-Fast Thermapen Thermometer is used by chefs all over the world. I only endorse a few products, on my web site, that I like and use regularly.
You can learn more or buy yours at: Super-Fast Thermapen Thermometer.
Sponsored Content
Did you know that the name sourdough comes from San Francisco and their famous sourdough breads? It is thought t
s://whatscookingamerica.net/NutritionalChart.htm”
target=”_blank” rel=”nofollow noopener noreferrer sponsored”
hat French bakers brought sourdough techniques to Northern California during the California Gold Rush in the late 1800s. If you don’t want to make your own sourdough starter, you can buy a San Francisco sourdough starter from Amazon.
Source: I adapted this recipe from the cookbook Nancy Silverton’s Breads from the LA Brea Bakery: Recipes for the Connoisseur, by Nancy Silverton and Laurie Ochoa.
Categories:
Sourdough Bread