How To Use an Electric Ice Cream Maker
Article contributed by Kelly Patey, a stay-at-home mom, who loves spending time in the kitchen with her family. When she is not busy cooking or baking, Kelly manages a website called Mom’s Kitchen Gadgets that is dedicated to helping Mom’s find unique kitchen gadgets for their home.
The Main Components of an Electric Ice Cream Machine from Top to Bottom:
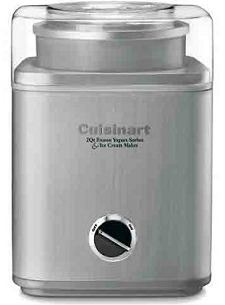
Spout – The hole in the top of the lid that allows you to add extra ingredients like nuts, cookies, or chunks of fresh fruit to your frozen dessert during the last several minutes of mixing.
Lid – Fits securely on top of the freezer bowl and snaps easily into place.
Dasher (or mixing arm) – Sits inside the freezer bowl and rotates the wet mixture until it becomes frozen.
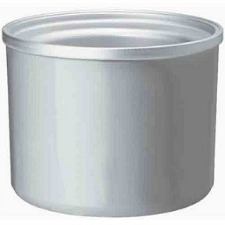
Freezer Bowl – The shell of the freezer bowl is made up of two layers of insulated material with a specially formulated cooling liquid in between. When this liquid is fully frozen and the freezer bowl is rotating within the machine, it turns a wet mixture into ice cream or sorbet.
Base – Where the powerful motor is housed as well as storage for the electrical cord.
Controls – Most models only have an on/off dial located on the front of the base.
Non Slip Feet – Located on the bottom of the base to keep the machine securely in place on your counter top.
How to Use an Electric Ice Cream Maker in Your Kitchen:
Using an ice cream maker in your kitchen is actually very easy. Here are the basic steps:
• Wrap the ice cream maker bowl in a plastic bag and put it in the freezer until the cooling liquid is completely frozen – about 10-22 hours. The plastic bag will help protect the bowl from freezer burn.
• Once the bowl is completely frozen and you are ready to make a frozen dessert, quickly place the freezer bowl into the machine
• Add the dasher (paddle) to the inside of the freezer bowl. In most models the dasher floats inside the bowl and does not attach to the machine.
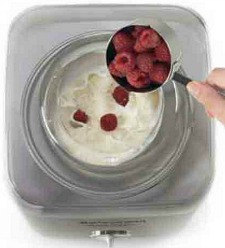
• With the machine turned on, promptly add your chilled ingredients to the freezer bowl.
• Replace the lid and wait 20-30 minutes for your favorite frozen treat.
If you like soft serve consistency, you can enjoy your ice cream immediately. If you desire a more firm texture, transfer the ice cream to a freezer safe container and freeze for 2-4 more hours.
Remember to always store ice cream or sorbet in freezer-safe, air-tight containers to prevent freezer burn. Never store your frozen treats in the freezer bowl.
Helpful Tips When Using an Ice Cream Machine:
As with every kitchen tool, there are tips and secrets that can help you get the most out of your appliance. Here are a few helpful tips to keep in mind:
• Due to the long freezing period required for the freezer bowl, it is best to keep it stored in the freezer at all times. This ensures that the freezer bowl will be ready whenever you are.
• Don’t try to use your machine if the bowl is not completely frozen. Your desserts will not firm up to the proper consistency.
• Don’t fill the freezer bowl completely full with your wet ingredients. The mixture will expand as it freezes which may cause it too overflow if filled more than way.
• When freezing your ice cream for later consumption, wrap your freezer-safe containers in plastic wrap to prevent freezer burn.
• Most components of the ice cream maker are not dishwasher safe. Hand wash only in warm soapy water.
Benefits of Using an Electric Ice Cream Maker:
 There are countless benefits to making your own ice cream, sorbets and granitas. Here are just a few:
• Save money on buying store-bought treats.
• The variety of flavors and flavor combinations are endless. It is easy to convert your favorite ice cream recipes to use in an Electric Ice Cream Maker. Check out some delicious Ice Cream and Sorbet recipes:
Champagne Citrus Sorbet
Homemade Chocolate Custard Ice Cream
Homemade Vanilla Custard Ice Cream
Homemade Strawberry Ice Cream
Italian Pistachio Gelato
• Nothing beats the flavor of fresh fruit in frozen desserts.
• Easy to adapt recipes for making sugarless treats for specialty diets.
• Avoid additives and preservatives that are found in most commercially prepared desserts.
• An electric machine saves the headache of adding salt and ice to the older style manual machines.
• Compact to save on counter and freezer space.
• Great family activity that the whole family can do together.
Making your own ice cream can be a fun and rewarding experience with an Electric Ice Cream Maker. These convenient kitchen tools are an easy way to enjoy a tasty treat after a long hot summer day.