The first thing to know is that a good mayonnaise recipe has vinegar in it. You can use a regular, white distilled vinegar, or you can amp up your mayonnaise with a flavored vinegar, such as a champagne or pinot noir vinegar. If those are a little too adventurous for you (you may have a 15-year-old in your house!), you can use a plain white wine vinegar – either way you choose, you will dress up the mundane in no time!
Chicken Salad with Champagne Mayonnaise recipe, photos, and comments by L. A. O’Neil.
More great Poultry Recipes and Butters, Condiments, Sauces, Relish and Jelly Recipes for more great cooking ideas.
- 2 boneless chicken breasts, skinned and seasoned with salt and pepper to taste
- 1 tablespoon butter
- Splash of olive oil
- 1/4 cup green onion tops (scallions), sliced on the bias
- Salt and pepper
- 2 tablespoon Champagne Vinegar Mayonnaise
- Cashews (or other nuts for crunch, optional)
- Celery, diced (optional)
-
Prepare Champagne Mayonnaise; refrigerate until ready to use.
-
Heat a skillet (preferably cast-iron) on medium heat. Add butter and the splash of oil and heat. NOTE: When you want to brown something, if you add a little oil to the butter, it will keep the butter from burning.
-
Add the chicken breasts to the hot butter/oil mixture, turn down the heat to low, and saute the chicken breasts for approximately 8 minutes until brown. Turn the chicken breasts over and saute for another 6 to 8 minutes, depending on the size of the chicken breasts until browned.
-
Remove the chicken from the skillet, and let it rest on the cutting board for about 15 minutes (you want the juices to redistribute back into the meat).

-
When the chicken is cool, cut the breasts into 1/2-inch chunks.

-
In a medium bowl, combine the chicken chunks, scallion tops, salt, and pepper. Add your homemade Champagne Mayonnaise, a little at a time, and toss gently. NOTE: Add the amount of mayonnaise that you like to achieve the right consistency for you and your family. Cover and chill in the refrigerator for a couple of hours to let the flavors mingle. -
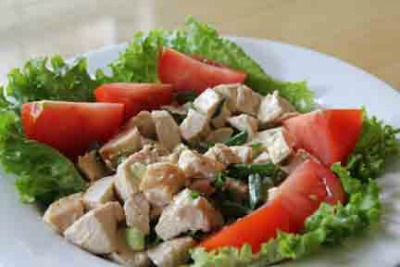
Serve on top of tomato slices, an avocado half, or (my personal favorite) right out of the bowl! I like to add some cashews for some extra crunch. You can also add diced celery if you desire.
-
It’s that simple! Once you make your own mayonnaise, you’ll never go back to store bought! And, as long as you have the ingredients on hand, you’ll never run out. That’s the best part - and, of course, how it tastes!
-
Makes 2 servings.
-
-
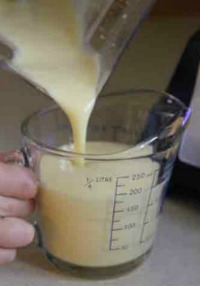
With the blender running, add the oil very slowly in a thin stream to start the emulsion process. The mayonnaise will begin to emulsify (get thick). Keep slowly adding the oil until it is the consistency you want. You may find that you will use a little less oil, depending on your personal taste.
-
As the mayonnaise begins to thicken, turn off the blender, and scrape down the sides and bottom of the blender by the blades. Turn back on, and slowly add additional oil, if needed.
-
Transfer the finished mayonnaise to a bowl. If not using right away, cover with plastic wrap and refrigerate. The sauce will keep for a good week.
-
Makes approximately 2 to 2 1/4 cups.
-
* Since raw eggs are being use, only use the freshest eggs you can buy (the fresher, the better). As an egg ages, lecithin, a protein that acts as the central emulsifying agent, breaks down and the power of the egg yolk to stabilize the mayonnaise weakens. You may also use pasteurized eggs.
** For a basic mayonnaise, use an oil with a mild flavor that won't overpower the other ingredients. If you plan to refrigerate your mayonnaise, then choose a refined oil such as pure olive oil or sunflower oil. An unrefined oil, such as extra virgin olive oil, will solidify when chilled and cause separation later as it returns to room temperature.
Check out more interesting articles and recipes on using the blender by April Jones:
Articles and recipes contributed by April Jones as a resource for helping you find the best kitchen blenders for your kitchen. You will also find a growing resource for a variety of blender recipes from breakfasts, dinners, desserts to smoothies. April loves to share with others about the benefits of healthy eating while making it fun and lasting. Healthy living begins in the kitchen.
Chicken Salad with Champagne Mayonnaise
I usually make chicken salad out of one of the breast pieces – it makes just enough and I love to ‘much’ on it while I’m writing. So, just to prove to you that I’m not out of my mind, I’m sharing my favorite Chicken Salad recipe. You’ll only need one appliance – your blender -and your skillet!
Cranberry-Orange-Banana-Spinach – Green Smoothie
From this recipe you can add different types of greens, different vegetables, more fruit or less and so on. Blend up a big batch and take with you to work or keep in a container in the fridge to drink on through out the day.
Juicing For Health – Can green smoothies stop junk food cravings?
Drinking whole raw foods blended in to a nice smooth drink can help overcome addictive cravings for coffee and donuts. Drinking a green smoothie is taking the first step to replacing a bad eating habit with a better one.
Juicing vs. Blending
Is it better to juice or blend? There is always a lot of discussion among my friends about whether they should juice fresh produce or blend whole foods.
Parmesan Crusted Pork Chops
I’m always looking for ways to prepare something that is a regular, every day, old-fashioned ingredient, and pork chops filled the bill. I figure the meal, I’m going to tell you about, cost no more than $2.50 per plate. Where are you going to beat a deal like that? This recipe takes no more than 30 minutes to prepare, and I guarantee that your family will be hanging around the kitchen wondering when dinner will be ready.
Zesty Prime Rib Steak with Chimichurri
It takes less than a couple of minutes to blend a fantastic chimichurri or roasted red pepper sauce for a tasty bit of beef (that you seared and roasted in your cast iron skillet!)


