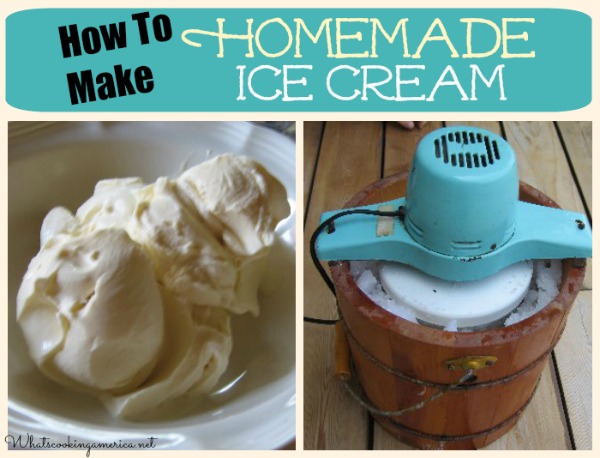
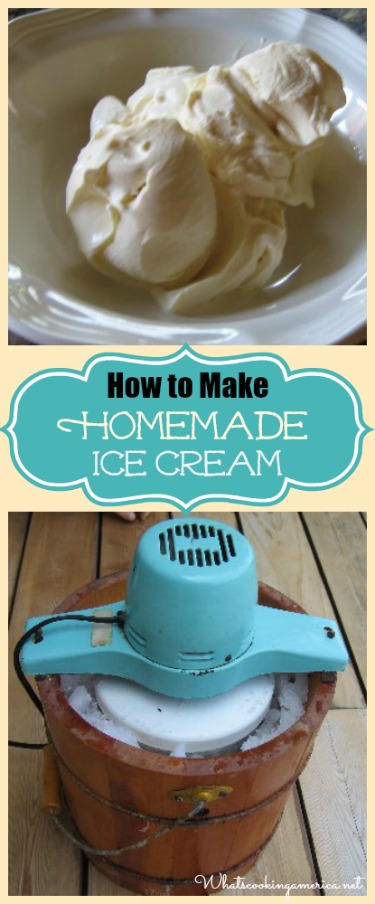
How To Make Homemade Ice Cream
Vanilla and Chocolate Custard Ice Cream Recipes
When you make your own, you combine fresh, rich ingredients with the flavorings and add-ins of your choice, for a delectable experience. If you own an electric or hand operated ice cream freezer, making your own ice cream can be fun and easy.
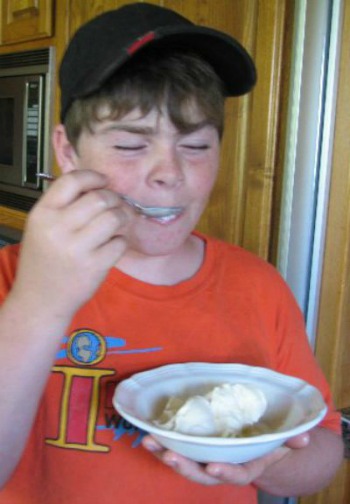
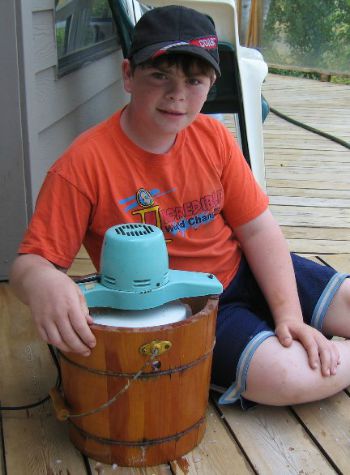
My grandson, Chris Hartman, was given his great-grandmother’s old-fashion ice cream maker. The recipes below are his first attempts at making delicious homemade ice cream. Chris now likes to make homemade ice cream for all our family gatherings.
More delicious Ice Cream Recipes and my daughter’s absolutely fantastic Italian Pistachio Gelato.
For a detailed and interesting history of the following individual types of ice cream, check out the underlined ice cream titles: Baked Alaska – Ice Cream and Ices – Ice Cream Cone – Ice Cream Sundae.
- 4 egg yolks
- 1/2 cup granulated sugar
- 1 cup milk*
- 1 cup heavy cream or whipping cream*
- 2 teaspoons pure vanilla extract or 1 vanilla bean, split and scraped
- Crushed Ice
- Rock Salt**
-
I usually double the recipe when making homemade ice cream. It is so good, that it will not last long!
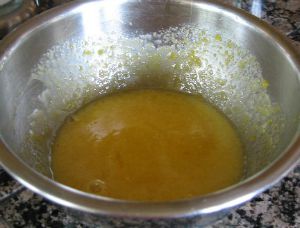
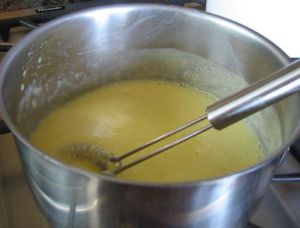
Making the custard:In a medium-size bowl, add the egg yolks and sugar; beat until thick and lemon colored; set aside. NOTE: If making Chocolate Ice Cream, add the cocoa powder to the egg mixture now.

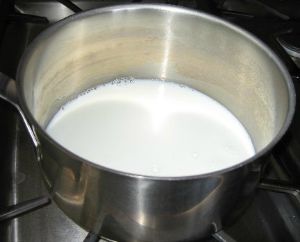
In a small heavy saucepan over low to medium-low heat, add milk. Slowly bring milk just to a gentle simmer or until it begins to bubble around the edges (do not let the mixture boil). Remove from heat.
Gradually stir hot milk into beaten egg/sugar mixture with a wire whisk. Pour mixture back into the saucepan. Over low heat, stirring constantly, heat until the mixture (custard) thickens and will coat the back of a metal spoon with a thin film, approximately 7 to 10 minutes.On your instant-read cooking thermometer, the temperature should reach between 165 and 180 degrees F. This process is known as tempering. NOTE: Do not let the mixture boil or it will curdle. If, of course by accident, your custard base does curdle, immediately remove from heat and place in a blender; process until smooth.
The FDA and the USDA advise consumers to use a recipe that contains a cooked custard base when using eggs in your ice cream recipe. The custard base must reach 160 degrees F, measured with a cooking thermometer, to kill the salmonella bacteria. Additionally, it is important to only used pasteurized milk and cream products in making your homemade ice cream.Remove the custard mixture from heat and let custard cool. NOTE: Cool quickly by setting pan in ice or cold water and stirring for a few minutes. Using the ice water method, the mixture will cool in about 15 minutes. Once the custard is cool, cover and refrigerate until thoroughly chilled, at least 1 hour or until it reaches 65 degrees F. on your instant-read cooking thermometer.
This is the custard base. This custard base can be used in many other ice cream recipes where you want a rich, creamy ice cream. Place mixture back in the refrigerator for at least 4 hour, but ideally for 24 hours. This aging process will give the mixture better whipping qualities and produce ice cream with more body and a smoother texture.
When the custard base is cold, stir in the heavy cream and vanilla extract or vanilla bean scrapings. Stir or whisk just until mixture is well combined. If you want to add any extra additions (fresh or dried fruit, candies or confections, nuts, or alcohol), now is the time (see below for directions). The ice cream is now ready for the freezing process.
Transfer the mixture into your ice cream maker and freeze according to the manufacturer's instructions. Either churn your ice cream by hand or by motor.
Variation: Add either 1/2 cup or unsweetened cocoa powder or 3 (1-inch) squares unsweetened chocolate or 1/2 cup chocolate syrup to make Chocolate Ice Cream.
* Whole milk, half & half cream, and/or low-fat condensed milk may be used to lower the calories (these substitutions may effect how creamy your ice cream will turn out).
** Rock salt – large crystal salt with a gray color, due to minerals not removed from normal table salt. This form of salt is available in most grocery stores, and also through hardware stores.
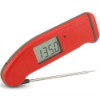 I get many readers asking what cooking/meat thermometer that I prefer and use in my cooking and baking. I, personally, use the Thermapen Thermometer. Originally designed for professional use, the Super-Fast Thermapen Thermometer is used by chefs all over the world. I only endorse a few products, on my web site, that I like and use regularly.
You can learn more or buy yours at: Super-Fast Thermapen Thermometer.
Sponsored Content
If you don’t have an ice cream maker, you can buy some nice counter-top size ice cream makers from Amazon – affiliate link.
How to Make Homemade Chocolate Ice Cream
The Science of Making Homemade Ice Cream:
Using salt and ice – The freezing procedure has a two-fold purpose, the removal of heat from the mix and the incorporation of air into the mix. Heat is removed by conduction through the metal to the salt-water brine surrounding the freezing can. To help the ice cream mixture to freeze, the container holding the mixture is surrounded ice and rock salt. If you use too much salt, the mixture will freeze too quickly and will not be smooth. If you use too little salt, the ice cream might not even freeze. Unless your ice cream recipe says otherwise, use 1/2 cup rock salt to 4 cups crushed ice.
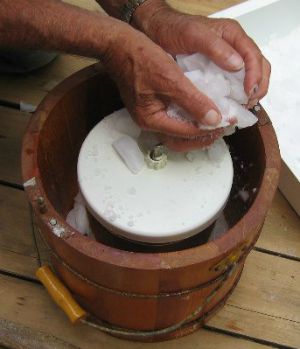
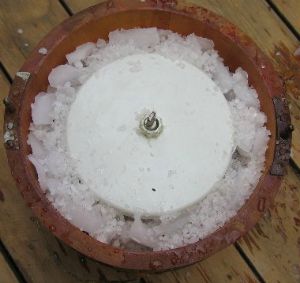
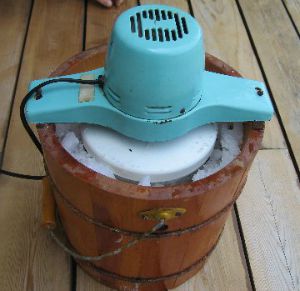
Ice Cream freezer is full and ready to go. We are now making homemade ice cream!
Churning – Good ice cream is determined not only by the taste but also the texture. The continuous churning with the ice cream freezer is important because it adds air into the mixture. This makes the ice cream smooth and increases its final volume.
Once you start the churning process, don’t stop! If you stop for a long break, large ice crystals would form in the coldest part of the mixture. This would produce a grainy texture in parts of the ice cream and the center may not even freeze. The continuous churning also distributes the flavorings and brings the un-frozen portions of the mixture to the surface. The ice cream mixture usually takes between 20 to 30 minutes to freeze and the freezing container is then placed into a freezer to allow the ice cream to harden.
When the ice cream is done, either serve and enjoy or transfer to freezer containers and freeze until firmer. NOTE: Freshly made ice cream will be soft. To freeze, put in an airtight plastic container and place in the freezer for at least an hour, preferably several hours or overnight.
Makes approximately 1 quart of ice cream.
 Storing Homemade Ice Cream: Homemade ice cream does not store as well as store-bought ice cream. For best results, transfer leftover homemade ice cream into a plastic airtight container. Store in the freezer for no more than one week. If the texture of the stored ice cream is grainy, let the ice cream soften, then beat it before serving to smooth the texture.
Customize your ice cream recipes with fruits, nuts, and flavorings: These extra added ingredients should be added about 8 to 10 minutes after the ice cream has begun freezing (at this point the mixture will be thick enough to prevent the chunks from sinking to the bottom). Some additions will need a little preparation before adding, and some ice cream bases may need some adjustments to accept the additions.
Fresh Fruit and Dried Fruit:
Fresh Fruit – Fresh fruit contains a lot of water, which will always result in iciness. One solution is to use a little more cream and a little less milk in the base. It is also recommended to add some skim milk powder to the mixture.
Bananas
Blueberries
Cherries
Mangoes
Oranges
Peaches
Raspberries
Strawberries
Dried Fruit – Dried fruit, such as raisins or dried cherries, need some liquid before they can be added to ice cream. Plump them in fruit juice or alcohol (such as rum, brandy, or kirsch) for 1 to 2 hours. You will not need very much liquid, approximately 2 tablespoons for each 1/2 cup of dried fruit.
Apricots
Blueberries
Cherries
Cranberries
Dates
Peaches
Prunes
Raisins
Candies and Confections:
Chocolate chunks
Heath bars
Peppermints
Brownies
Caramel sauce
Fudge sauce
Nuts – For best flavor, nuts should be toasted before adding them to the ice cream. Toasting Nuts – Toast nuts on a baking sheet in a 350 degree F. oven for about 10 minutes. Shake the sheet occasionally to prevent burning. The nuts are ready when they color. Pistachios do not work well in making ice cream as these nuts absorb a lot of water and quickly become soft in ice cream.
Almonds
Brazil nuts
Cashews
Hazelnuts/Filberts
Pecans
Walnuts
Alcohol/Spirits – Alcohol will reduce the freezing point of the ice cream and also makes the ice cream easier to scoop. After you cool the custard base, add 1 tablespoon of alcohol for each 1 pint of base. For stronger flavor, add 2 to 3 tablespoons alcohol to the mixture as it cooks. The heat will cook out some of the alcohol. Adding some skim milk powder (start with 1 teaspoon) to the base will help make up the difference.
Amaretto
Armagnac
Cointreau
Creme de Cassis
Creme de Menthe
Frangelico
Kahlua or Tia Maria
Rum or whiskey
If you don’t have an ice cream maker, you can buy some nice counter-top size ice cream makers from Amazon – affiliate link.
Past Comments from readers:
I want to thank you for your great website and wonderful recipes. I have been making your vanilla custard ice cream all summer long! You are right – it doesn’t last long because it is so delicious! I put 1/2 of a vanilla bean in the milk as it warms up and scrape the seeds into the milk. Wow is it good! Keep up the good work – Camille Brownson (9/13/09)
Comments and Reviews
Leave a Reply
38 Responses to “Homemade Ice Cream Recipes”
Sk
Instead of egg what can I use
Linda Stradley
Use this recipe: Easy Chocolate Ice Cream Recipe
ERS
How much ice cream does this make?
Linda Stradley
According to the recipe it makes approximately 1 quart.
kimona Howell
I’ll how it shares for more than one
Wanda
Yummy
Grandma S
Can I double or triple this recipe without changing the results?
Linda Stradley
I see no problem
Gayla Verhey
I quadrupled it and even messed the recipes up my not reading it correctly and it was delicious !
David
GREAT recipe. I have seriously considered opening a Frozen Custard store in the past… even going so far as to buying all the items to go into the store. My buddy bought into a FC franchise ( they all have proprietary custard mixes that come in a bag) Not long ago they changed vendors and the choc flavor is not up to par. Anyway, if it does not have egg yolk, it is not by definition “Custard” for that is what gives it the creamy texture. There is more tech that goes into a commercial machine that eliminates the mixing of air, for true custard is dense, where as ice cream does have microscopic air pockets that eventually ice up making it much easier to get “brain freeze”. With Ice cream your buying a lot of “air” which you will notice, should you forget to place a newly purchased quart of ice cream in the freezer, it will be half or 2/3rds full when melted. Not so with custard. Well, thank you for a great recipe… we did use only 1/3rd cup of sugar, and a blend of “Hersheys Simply 5” choc syrup ( 5 nat. ingredients; no sugar) and 3 tbs of choc powder. I used a 100 yr old, 2qt hand crank mixer and it came out wonderfully! Thank you.
lyla
Hello David
Me too my dream is to open a glacier. There are few in my country but they work very well. On the other hand I am completely beginner and I would like all the cards of my side. Can you propose me a list of the machines and the suppliers and all that I would need for the launch – any help is welcome. I will like so much to succeed. English is not my mother tongue; please excuse any errors on my part. Thank you.
mm
Hi, thank you for the great recipe! Should we wipe the heavy cream or just leave it as it is? Thank you!
Linda Stradley
I am not sure what you are asking.
Betty Orellana
I believe that mm meant whip instead of wipe. I was wondering the same thing. Would whipping the heavy cream make the ice cream creamier?
Sally Bond
Fantastic ice cream! It takes some time but, well worth it! I usually use a product off the shelf to make ice cream. Not anymore. This is so creamy and rich
Fred
Will replacing sugar with Splenda cause any problems?
Linda Stradley
I have not tried substituting sugar with Splenda when making ice cream. Maybe on of the readers can help you.
Christina Jones
No it will be just fine
larry stackhouse
great site
Lore pifer
I added the cream with the milk. Didn’t read all the directions. Will it still turn out ok?
Whats Cooking America
Yes, you want to add the milk and cream at the same time before heating.
allison
can I use white table salt or kosher salt instead of rock salt?
Whats Cooking America
The larger crystal of the rock salt is less expensive to purchase in larger quantities which are required for ice cream compared to table salt. Using rock salts allows for better control of the ice cream freezing process. The risk of using tables salt is the salt concentration to water ratio can get too high and freeze the ice cream too quickly.
Silver
Since I don’t have any heavy cream, you said I could use half and half and/or condensed milk instead.? I have both of these plus a can of evaporated milk, and a tub of cool whip. Which one(s) of these should I use and how much of each? Would a combination of any of them together be a better substitute for the heavy cream? It’s my first time making homemade ice cream and I’m only 20 so I don’t have a whole lot of experience in the kitchen, and I’m making this for a group of Co-workers, so I just really want this to turn out great!
THANKS! 🙂
william
can i just pour the mixture in a container and freeze or do i have to have an ice cream maker
Nancy
There any many recipes and techniques to make ice cream. Of course you can just freeze the cream mixture in a bag in the freezer but then you will have a different texture, more of an ice than a cream. The ice cream maker slowly churns the cream mixture into the smooth creamy texture that most people prefer.
Nate
Wow, that ice cream maker looks awesome. How much ice cream could you make in one churn? I think I need one!
David Valle
Awesome ice cream recipe. I love ice cream. Thanks for the share. I want more.
David Valle
Delicious Recipe!
Ricki Jones
I was wondering if I could make this up ahead of time? Several days before I’m going to actually churn it in the ice cream freezer. I was going to make it up at home and take it on vacation with us to churn in a couple days.
Aaron beeler
What is a brand of heavy cream is Carnation evaporated milk considered cream heavy cream
Whats Cooking America
Evaporated Milk is not considered heavy cream. Heavy cream is usually sold fresh in the refrigeration section and contains 36% milk fat.
Conner P.
I like the Recipe. it is easy as pancakes. But it is good to know how much Servings it makes. It is Just a suggestion to people like me. I would like it to be there to read, if it is worth it.
Comell W Moore
looks like a good recipe.
Maria Pappano
I made this and it’s wonderful! Thank you for the recipe!
Susan L
I was looking for my mother’s recipe and I couldn’t find it , so when I looked here on Pinterest and saw this one I was excited!!! It is the exact same as my mom’s!!!!!(only smaller portion) Yay!!
Millard W
Home Made Ice Cream
2 lg(5.1oz) or 3 sm. (3.4 oz.) Instant Vanilla
Pudding
3 cans Pet Milk
1 1 /2 Cups Sugar
Vanilla Flavor
3/4Gallon Homo Milk
Stir Pudding Mix into milk as you add
Millard W
Addition
6 Quarts
NO COOKING